Quantcast
Channel: Decor You Adore
Viewing all 118 articles
Browse latest View live

Spring Tablescapes-Imitation is the best form of flattery!

$
0
0


Decor You Adore
To be honest, today I am blogging about how to make beautiful interiors in an effort to avoid cleaning (and beautifying) mine. Do you ever have those days? I guess one of the hazards of being a blogger is getting lost in pinterest and a million awesome blogs with a zillion ideas. However, in all fairness, I'm stuck inside on this chilly day dreaming of the warm weather to come and all Spring's beauty and I'm thinking of ways to bring a little inside!

Awhile ago, Jacki had some fun with vases and created some sweet, Spring vignettes.


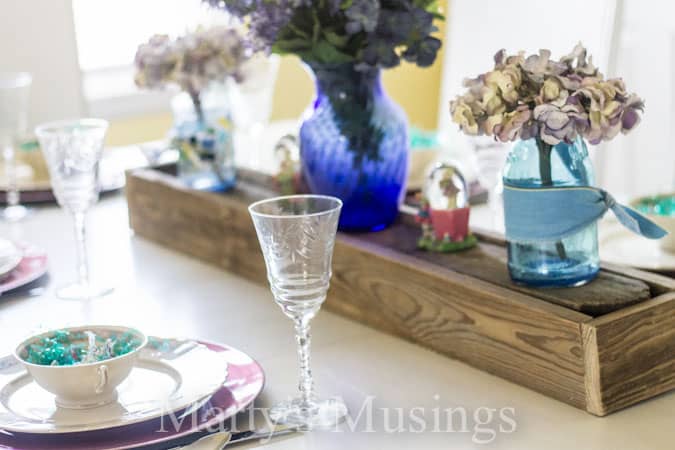
In my time wasting research, I happened upon Marty's Musings and this Easter tablescape.

Marty's Musings


Marty's Musings


Emily Clark showed us how a couple of simple branches can "Spring Up a Room" in a jiffy!

Emily A. Clark
Yes, please. You had me with the bunny! I might even do this one myself...today...if I step away from the computer!

Rattlebridge Farm


Oooh! Hydrangeas...one of my faves!

Centsational Girl
Oh.my.word. TWO BUNNIES!!! This is awesome and she has a step-by-step tutorial for the tablescape-challenged (like me!)

Lorie's Favorite Things


I hope you've enjoyed this eye-candy round up! I'm actually inspired to give it a go myself! Have a great day! The real Spring is coming...I promise!

Check out today's link up buddy!

36th Ave


RAWR! How to add animal prints...tastefully.

$
0
0
Catherine's office
I just love some of the cool animal prints that we're seeing in the last few years. But, there are some real hazards that MUST be avoided.  Unless you want to be THAT lady with all the animal prints here's what you need to know.

Pick a Print:
Decide which print you most adore. Are you feeling the cheetah print or the tiger print or my fave...the zebra??  Whatever you pick, NEVER and I mean NEVER, mix more than one animal print. I think the whole jungle is represented in this bedroom. 

source

Less is More:
Unless you are in to theme rooms (read: Elvis' Jungle Room), you're probably going to want to keep it simple and subtle. In my office, I have two pillows and a few candles in a brown, zebra pattern. Jacki constantly reminds me that there are no zebras with brown stripes in nature. I think that's irrelevant. Jacki--don't hate!
source
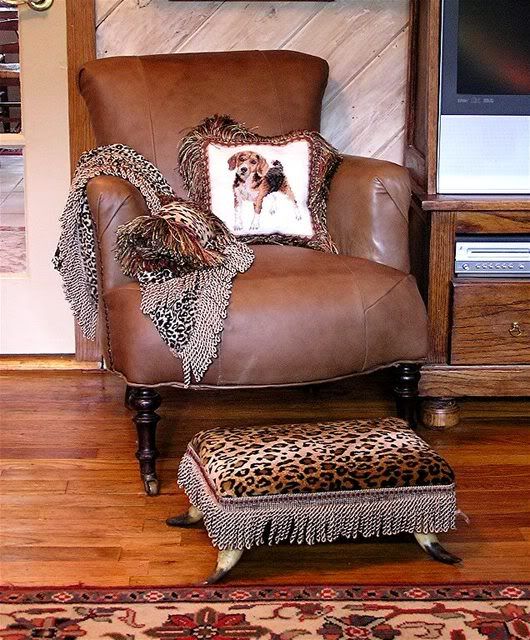
This classic leather chair would be so cute with ONE of these items, not all 3--too much!


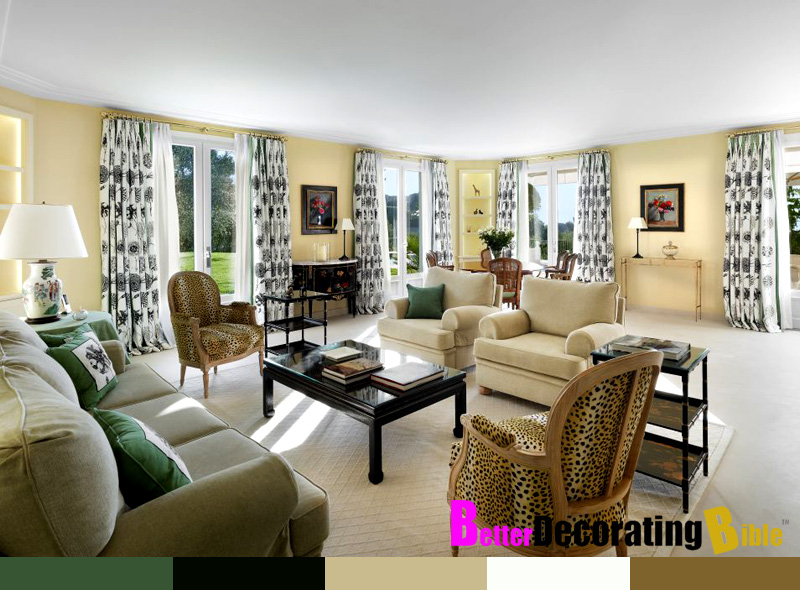
I like the matching set of leopard print chairs in this spacious living room. 
source
Start Simply:
I guess that's pretty decent advice for all aspects of home decor...unless you have the patience, time and money to fix it if you hate it. For animal prints, start with accessories. They're out there...by the boatload. With accessories, you haven't made a huge investment. If you decide you don't love it after awhile, you can easily change it. If you are digging the call of the wild, you can get a little more daring and go for a rug or a piece of furniture.


I hope these quick tips have inspired you to release the beast in your home! 
Have a wonderful  weekend!

Easy, Budget Friendly Update: Add Scallops!

$
0
0
Beautiful Scallop designs are everywhere in home decor. Layla Grace
While waiting for the famed Cherry Blossoms to bloom in Washington DC this weekend I was walking around noticing all the beautiful architecture.  As we popped in and out of museums, I spied one trend that seems to have made a comeback in 2013: Scallops!

Scallop Coastal Mirror: Pinterest
 Spending some time in Alexandria with family members prompted a home tour and a request for help from the Decor You Adore experts. Just like everyone I know, my Mother-in-law's sister is looking for an update without breaking the bank. After thinking about it for a while it came to me....

Scallop Mirror, Pinterest
A simple, inexpensive way to get an fresh new look is to add one or two items representing a current trend. Since scallops are trending right now, why not add a beautiful mirror like the one pictured above?

Lantern: Colleen and Company
Or add a lantern-style chandelier in a beautiful updated color like teal.

Source: Cutting Edge Stencils
 I love this stenciled office wall. It would be beautiful in tone on tone satin and flat wall paint.

Hobby Lobby Cobalt Knob $3.99 each
Hobby Lobby has a wonderful selection of knobs and drawer pulls. I adore these cobalt blue scalloped knobs. A simple, inexpensive update would be to add them to your bathroom vanity and then add a new coordinating shower curtain.


If you like to sew, check out the Destination Craft Blog for tips on how to create these cute panels.

 If you really want to go all out with the scallops, check out this statement scallop tile. Wow! Source: Pinterest


 Another great option is this neutral scallop rug from Capel Rugs.


Source: Etsy.


If you aren't quite ready for a commitment like ceramic tile, simply add a couple of throw pillows like these from an Etsy shop.

We'd love to see how you've used scallops in your home decor. Post in our comments section! 


Linking up today with The Dedicated House--


Wood Flooring 101

$
0
0


Kitchen is cleared out and floors removed. Subfloor is prepped and ready for installation
 When looking at flooring options, the choices can be daunting! Do I want pre-finished, factory-finished, laminate, engineered or hardwood? What do these terms even mean? Our friends just moved in to a 10-year-old home and found out that the damaged floors could not be salvaged because they were engineered and had already been sanded once in their lifetime. The only solution was to rip them out and start over.
She choose 3/4" solid hardwood white oak that will be finished on site. They were delivered yesterday and must acclimate to prevent warping for at least 72 hours. Keep checking back for the beautiful finished product. Meantime, I've summarized the jargon for you in case you are facing the possibility of replacing your own floors. Good Luck!
 

Wood Floors 101
Engineered Wood Floors: 
Engineered wood floors are made like plywood. They are made up of several layers of wood or wood composite that are laminated together. The top layer is made of hardwood and depending on it's thickness, can be sanded and refinished. Most engineered wood floors are prefinished and can only be sanded and refinished once in their lifetime. 

  • Less expensive option
     
  • They are a good choice over a cement slab floor, and are frequently installed by being glued down. 
  • Because of their thinness, they can be installed over existing flooring. This allows a homeowner to more easily transition between floors that are close in height.  
     
  • Engineered wood tends to be more stable - it is less likely to move or warp with changes in humidity or temperature. This is because the different layers of wood have the grain running in different directions.
  • Engineered wood floors can last the lifetime of a home if properly maintained, while laminate floors typically last between 15 and 30 years.
Laminate: laminate floors are created from synthetic materials bonded with fiberboard.
  • Laminate floors can be made to resemble any type of wood or stone, while engineered wood floors take on the characteristics of the wood the top layer is made from.

  • Laminate floors are much easier to install than engineered wood floors. This can help save money on installation, as professional assistance may not be necessary for laminate flooring.
     
Solid Hardwood Flooring:  
A solid piece of hardwood, generally cut into 3/4" thick planks. Hardwood flooring comes in a variety of lengths and widths and still remains the most popular choice for homeowners. Solid Hardwood flooring comes unfinished, which is then installed and finished on-site; or prefinished, which is completely finished at the factory with several coats of durable finish, before it's ever delivered to your home, then simply nailed down.

  • Longevity. A solid hardwood floor generally has a thicker wear layer when compared with a typical engineered floor. This allows customers to sand and refinish their floors time and time again, even changing the color of the floor if desired.
  • Grain pattern. Many engineered products have a top layer that is peeled from the log. Because solid boards are sawn from the raw log, the grain pattern is tighter and denser when compared with peeled veneers. In addition to the aesthetic difference between peeled and sawn wear layers, a solid sawn top layer adds durability to the flooring.
  • Installation of solid hardwood can be more complex than that of engineered flooring. Requirements for proper subfloor moisture conditions, the flooring's moisture content, and the climate in which the flooring is to be installed all are usually more rigid than they are for engineered flooring.
  • Most solid hardwood flooring must be installed via a nail-down or staple-down method, however,  now there are a few manufacturers that produce products that may be glued or even floated, eliminating the need for a wood subfloor. Always follow the manufacturer's recommendations.
    Hope this little summary helps! We'll be supervising the installation nextweek so we'll update more then. Have a great weekend!

A Music Room to make you sing and a Plow & Hearth giveaway!

$
0
0


Recently we had the opportunity to work with a lovely lady with classic taste. She was experiencing a bit of "decorator's block" (hey! it happens to the best of us!)so she called the Decor You Adore hotline.

Many traditional homes have a formal living room to one side of the foyer and a formal dining room to the other. Well, that's convenient if the Pastor is coming over for tea after church. For the rest of us, who want to LIVE in every square foot of space, this floor plan often means we have rooms in our homes that we walk past daily to get to the rooms we actually USE.


Often the answer to the useless formal living room is to turn it into a study, but our client already has a home office upstairs. A very talented musician lives in the home, and, oh, yeah, a gigantic baby grand piano too.

Solution: Turn her under-used room into a cozy, curl up, read a book, listen to music, bright and inviting Music Room that you want to enter.


Keeping only the piano and the round accent table in the room basically gave us a blank slate on which to create a functional, fabulous and frugal design. We presented two different mood boards for the client, the first involved opening up the staircase to reveal a more open concept.

We suggested a coffered ceiling, adding a large scale pendant light and two comfortable chaise lounges or chairs and ottomans. Our resident contractor, (literally, Jacki lives with him), gave us the dirty deets on opening up that stairwell. After we picked up our jaws at the shock of the amount of construction (and moolah!), we decided to leave the wall and brighten and lighten with paint and accessories.


For inspiration, we played off the black lacquer of the piano and added the client's favorite color: apple green. Green is a tricky color, it can read juvenile or whimsical, which is fine if you are designing a playroom. But our sophisticated client wanted an updated color scheme that was classic and tasteful, while still youthful and inviting.

This tablescape portrays our vision for the color palette in the room. Source: Pinterest


In lieu of two facing chaise lounges, we elected to go with two small scale club chairs with ottomans, and found these at Plow and Hearth.

Two options for our room are the Cream or Kiwi linen. The chair is $399 and the ottoman is $199. A GREAT price for quality, US-Made furniture. Online shoppers can also take advantage of additional savings sent directly to their inbox by signing up for the Plow & Hearth newsletter.


Like this chair? Keep reading to see how you can win a $50 Plow & Hearth gift card!


Our final mood board presentation.


Lamps
Check out these gorgeous silk draperies
You may be thinking, man, that's a LOT of green. Have you ever seen an all white room and thought, oh, I could never pull that off? The secret is layering on texture. Silk draperies, linen upholstrey, cut velvet pillows, glass, wool rug, and a comfy throw. Texture, texture, texture!
Here's an example of how a room with one color and maybe a pop or two can really work.

BHG.com


With such rich details and elegant finishes, the narrowness of this beautiful bedroom becomes an afterthought. Ample window treatments, a flowing bedskirt, and gilded finishes all give the room presence, beyond its diminutive size. While purple is regal, an orchid shade is both grand and suited for a small space. The soft hue introduces color without becoming an overwhelming feature.

We can't wait to see how this lovely music room comes together. Stay tuned for updates on this project and more!

Are you ready to start a decorating project of your own? Our generous friends at Plow &Hearth have offered a $50 gift certificate to help get YOUR decorating project underway.


The indoor/outdoor traversing curtain rods that I am using on my patio makeover are from Plow & Hearth and I am loving how I can swoop my curtains all the way across the rod without obstruction.

Here are some more of our favorite Plow & Hearth finds:


 Here's how to enter to win:

A winner will be chosen this Friday, April 19 at 5pm. You must do each step to be eligible to win.  


Good Luck!

Linking up with The Scoop and The Dedicated House.


A Made to Order Farm Table!

$
0
0

Jacki's awesome new farm table!
Hello Adorable Readers and Happy Humpday! I can only greet you through the haze of my decongestant! As a native North Carolinian, I cannot recall a heavier pollen season. At least yellow is a great color...that's the best silver lining I can find.

You may recall our post on lightening up  a few weeks ago.......We're revisiting that as it relates to Jacki's awesome, new farm table.

Jacki was pining away (all puns intended) for a farm table for her eat-in kitchen. Since her handy hubby put the kabash on her dropping $2,000 at the local Restoration Hardware, he had no choice but to whip out some power tools!

Inspiration pics:

Arhaus

Metal bar supporting table

Restoration Hardware

It seems that the multiple chandelier's over the dining table are trending right now.

More contrast needed? But, I do love the light wood and the rustic look!
One of the contractor's that we work with, Chris, scored some reclaimed barn wood from a barn that was torn down in Durham, NC.


This barn ceiling started out as 16 foot planks. They were cut in half to create a perfect 8 foot table size.

After the boards were planed and sanded, they were joined together to create the top.

Next came the X base created from much larger reclaimed barn beams.


Unfortunately, the barn wood had a slight twist in each piece. Patrick was optimistic that it would lessen with the weight of the legs and table when it was all assembled. That was not the case, but adding a steel frame as an apron easily removed the twist. It was either that, or park our car on the tabletop for three months. You may want to avoid this by selecting perfect wood or by alternating twists if possible.


Bob welding a frame to straighten out the warp in the wood. This frame was attached to the underside of the table and a faux oil rubbed bronze finish applied.


Jacki was so excited, the table got to come in before it was finished for a quick test drive!


We had a good time beating the table to smithereens to create the distressed look.
This barn was one sturdy structure. The wood is heavy and solid.  It is best to make your table so that it can be dissembled so it is not too big or heavy to move. This one weighs around 500 pounds and we had to remove the window to bring it in the house.

Not quite the stain color envisioned. Sigh..
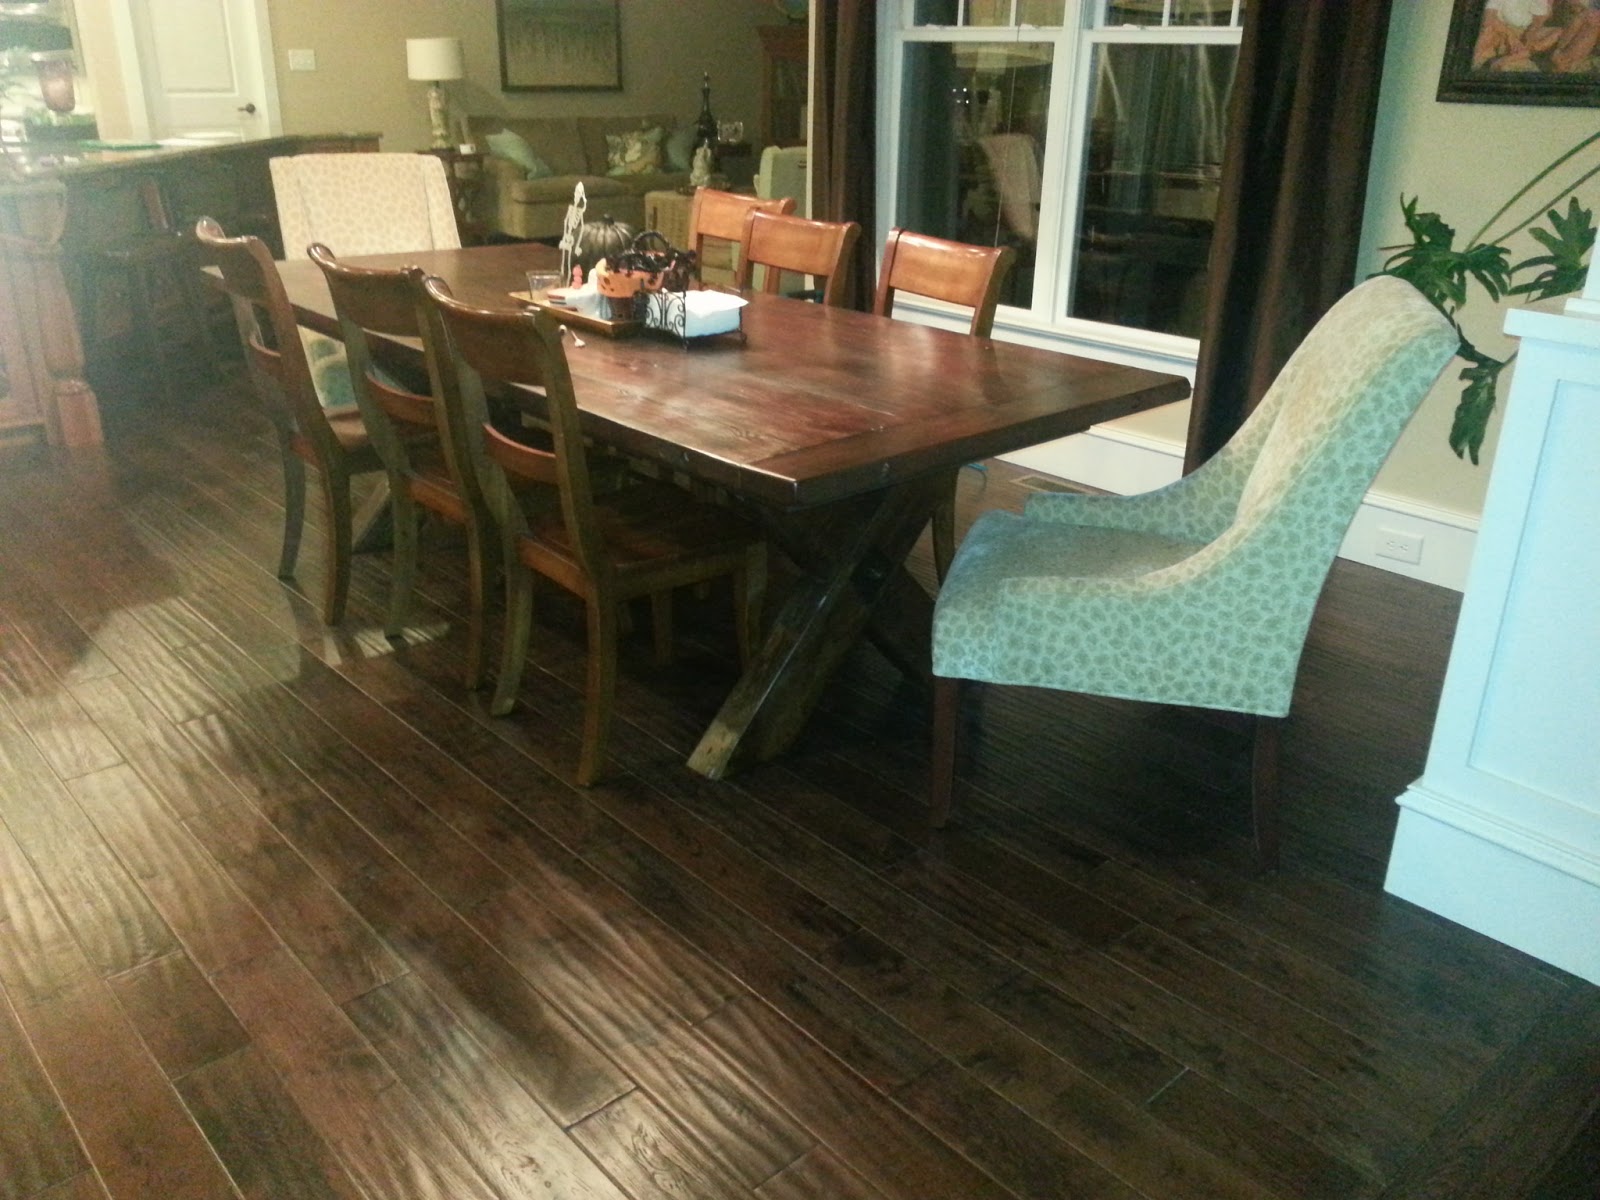
Once we added the stain, there was a bit of a problem. It blended right in with the chocolate curtains and the dark hardwoods. This is actually a serious dilemma. After the dozens of hours of hard work put in by handy hubby, there was NO way it was getting restained, removed or remodeled in any way, shape or form. Hmmmm.....
With the brown floors, the brown stained chairs, the HUGE eight foot BROWN stained table, we're talking a LOT of brown.


The flash in this picture helps a little, but unless it's a sun-shiny day outside, it was pretty dark.

Solution #1: Camo
Spring was the perfect excuse for some lighter, brighter camouflage! 
Found this cute tablecloth at Homegoods.
Of course flowers make it even prettier!


Then pure genius struck! 

Solution #2: A rug
A rug in a lighter shade creates a backdrop that allows the table to really *POP*!
This one is from Home Decorators and is called Home Decorator's Saddlestitch Indoor/Outdoor Rug
What a wonderful difference the rug makes! The dark stain is growing on me.
The cheetah chairs were $30 each at Habitat. Thank you to whomever donated those~ Score!


Now you can really SEE the beauty and craftsmanship of the table. It took Patrick months to complete this project and it's something we will have forever. (He said he'd kill me if I sold this one on CraigsList).

Speaking of Craigslist, it's a perfect source to find old barnwood to create your own DIY farm table. I found this one nearby in Efland, NC. Here's the link: Barn on Craigslist


 Patrick has created some steps to follow if you are interested in attempting a masterpiece of your own:


  1. Determine your table size. Buying lumber by the board foot might need some explanation. A board foot of lumber is 1 square foot at 1” thick. If you desire a thicker table, each square foot will be multiplied by the thickness to get the total number of board feet. A table that is 3’ x 7’ and 2 inches thick is 42 board feet. This also varies if it is rough cut or finished. Your table will turn out best if you can either pick through the lumber or get lumber that is longer than you need. You may end up buying 60 board feet for your 3’ x 7’ table.                                           
2. Figure out the legs. 4 straight legs is easiest, but you need to also consider how to connect those legs and still have room for chairs. There are endless choices for the legs, just find a look you like and try to implement it. These may come from posts in an old barn if you want a larger dimensioned leg. You can also laminate thinner lumber to get that look.

3.       Prepare the lumber. If you get the wood from an old barn, it is very likely that the lumber will be rough cut and need some finish work to prepare for a table.

a.       The first part of this is to remove all metal from the wood. This may be old nails or staples in the wood. This might be where you first decide to quit. This is time-consuming and may seem never ending, but it is important to prevent damage to your prized tools.
b.      Next, you need to try to best get the sides parallel and the thickness consistent. This is the part that requires the most specialized tools for a perfect stack of ready lumber. A planer, jointer and large panel sander would be nice,  but most people don’t have one. If you do, you probably already know what to do to get your lumber ready. Another option is to do your best with simpler tools. You can use a circular saw coupled with a long edge clamp to get one edge straight. Once you get that straight side, you can cut the other on a table saw to get the desired board width. This isn’t a perfect way since your “top” surface may not be straight.

4.       Once you have 2 parallel sides, you can start joining your boards to get the total width of the table. Use glue and good clamps.

5.       Sand, sand, sand. You will likely need a belt sander with a very rough belt (36 or 60 grit)to get the rough cut finish knocked off.

6.       Cut the end of the table to length.

7.       Build the legs.

8.       Attach the top.


9.       Apply your stain and finish.

Don't forget to read yesterday's post to enter to win our $50 Plow & Hearth gift card!!!

Linking up with Not Just a Housewife!

How to display your child's art

$
0
0

When I moved into my current house and had a stainless steel refrigerator, I had to get creative about displaying my most prized art collection. We added a chalkboard (for fun) and a magnetic board for displaying good grades, fine art, invitations, birth announcements, etc. 

Here are some more out of the box (read: off the fridge) ideas:

How cute are these pillows??


source
This is a great idea...scanning many pictures and putting them in one framed collage!

source
Or, framing each picture and doing a gallery wall.

source


These work well if you're changing the art frequently-


source


source

source
These ideas can work in any space you find appropriate in your home. My hubby likes to have children's art around his home office to enjoy during especially boring conference calls. One of the blogs we adore, emily clark has several articles about displaying her children's masterpieces.

And, if you don't have children and are longing for some of this fine art, call your niece or nephew for some of their best work.

Don't forget about our $50 Plow & Hearth gift card giveaway. Click here and scroll to the bottom for details on how to enter. Contest ends tomorrow so you better hurry!

Linking up with House of Hepworths today!


Meet Arty, our little blue friend!

$
0
0

I like how Arty echoes the color of the back of the bookcase.
TGIF Ladies (and the one guy that reads this blog- we love you too)! Our big plans for the weekend include home and garden maintenance--ya know...the usual!

Today's post will be brief but I couldn't resist introducing you all to Arty! Isn't he lovely? A few weeks ago when Jacki & I were shopping for a client, I found a little something for myself. You may remember that I'm in the process of moving and paring down but still trying to infuse a little color without breaking the bank (or my marriage)!


Arty is beautiful and a guy that won't cause trouble in paradise (read: he cost $12). But, his original state left a little to be desired. This can only mean one thing...Jacki's about to get up close and personal with a can of paint. She's the crafty one remember?

Here's how it went down (according to J-Poov (that's her street name):


Poor Arty sat on my kitchen counter for a month before Catherine nagged gently reminded me to paint him. I don't know what kind of miracle worker she thinks I am, it's not like I have a kiln to fire glaze him.
I was in the middle of painting my front porch furniture and had paint all over me, so I brought Arty outside and gathered my supplies.


This is what I needed, but of course I didn't have THIS color, so I had to mix.


Oh, Arty, you are looking more "Tiffany Box Blue" and nagger Catherine wanted Teal.


So, I poured in some of the apple green paint I was using on my porch glider and mixed some more for the second coat.


Much better. 
Right about this time, my boys arrived home from school and they pounced on the opportunity to paint something. I handed over the brush to Ben and he covered a bit more than I would have, but I think it still looks good. (I would have left some spots of bare concrete showing.)


Is that a PAINT DRIP? Uh oh, I hope Picky Catherine doesn't notice that.

And after a coat of spray gloss, here's Arty after his makeover:

Isn't he lovely? I think he's perfect-o!

Now for Jacki's allegations:

I left cutie-Arty out in my driveway for Catherine to pick up. When I arrived home from dive practice with my family, there was a 10-31(crime in progress); a full-on home yard invasion. Burglary. Theft. Robbery!


Source: BHG.com. Snowball Bush Viburnum
A certain someone trying to STEAL my snowball bush blooms!

The NERVE!

Begrudgingly, I cut some for her and sent her, Arty, and half of my Viburnum bush on their way.

What was left of the Amazing Viburnum Snowball Bush blooms in my family room. She's lucky I didn't call the cops!

Check out these other blue projects at The Dedicated House. We're also linking up with Liz Marie and Chic on a Shoestring today!

And, don't forget to enter our contest for a $50 Plow & Hearth gift card. The drawing closes at 5pm today and we will announce a winner on Monday! Enjoy your weekend!


Liz Marie Blog
Chic on a Shoestring Decorating

Stella & Dot: Baubles We Adore- Plow and Hearth Giveaway Winner Announced!

$
0
0


Good Morning! I hope you enjoyed your weekend. The temps around here have been kinda chilly for late April but the blooms have remained beautiful!

I'm a bit off topic today since we usually focus on making your home more adorable. However, I couldn't resist letting you all know about a lovely lady I met a few weeks ago! Her name is Leslie and she is an independent Stella & Dot stylist. And let's be honest, who doesn't want to make herself a little more adorable too??

I was invited to her launch party and bought a few things and absolutely fell in love with their unique jewelry. I always see other women's jewelry and think how great it looks. I sometimes even wish I had a different piece to adorn the day's outfit but I NEVER seem to think of it when in the position to acquire jewelry.  Leslie offers great ideas for outfit/jewelry pairing and Stella and Dot has tons of classically styled, yet trendy pieces to add the finishing touch to any ensemble! Check out her site, http://www.stelladot.com/sites/lesliebarton for all the goodies! You can shop now and/or create wish lists for later (super handy for hubbies for Mother's Day and birthdays).

I am actually hosting a virtual party that ends today. You can go to http://www.stelladot.com/ts/ciro5, order today and have your baubles by the end of the week! They have really fast shipping. You will also be entered to win a pouf like this one if you place your order today:

Check out some of the pairings Leslie suggests:


I already have a navy tank like this one and white jeans! I'm totally adding some of these jewels to complete the look!


I hope you find something beautiful for yourself or someone else from Stella & Dot!

Thank you to everyone who entered our contest for a $50 Plow & Hearth gift card. Our winner is Angie! I'll be getting in touch with you later today to get your gift card to you.

We are also linking up with Keeping it Simple and of course our friend Kathryn at The Dedicated House. Head on over to both of these blogs for endless ideas on home decor and more!


                      Keeping It Simple             

2013 Color Of The Year: Emerald Green

$
0
0
It's everywhere, in fashion, in home decor, in major furniture pieces. How can you add the 2013 Color of the Year to your decor?

I've outlined three ways to bring in the bling. 
Emerald green bling that is!

Small Investment:


All of these items are vintage, retro or from a thrift store. You don't have to spend a lot of money to get an updated look. Set the table in some green depression glass that's been in your attic for 20 years. Everything old, is new again!

Medium Investment:

A few throw pillows, a statement vase, or some chevron curtains are a good way to bring in the emerald without a major investment.
Source: Signet Rings and Preppy Things

Large Investment:
Source: Show Home
Okay, so this is a BOLD option. Can you imagine what Patrick would say if I said I wanted to paint his farm table Emerald Green?
Check out the table they used on the sun deck at the HGTV Smart Home 2013. It's not green, but I love the bold look of such a large piece.
To stand up to Florida's harsh and changeable weather conditions, a pine trestle-style table is treated with two layers of primer, three layers of car paint and finally two layers of clear coat. Vintage steel chairs cozy up and offer seating for eight.


About two years ago, I found these awesome shop lights at the Charlotte Metrolina Antiques Market. I took a picture and sent it to Patrick who was NOT thrilled with the rough, worn, GREEN lights coming into our home. I've been looking for something to go over my spaceship kitchen island, and now I'm kicking myself for not getting them. I'm sure the ones in the photo above the green farm table are new, but I'd rather have the ones with history. Bummer.


Normally I don't recommend upholstering your large, investment pieces in a trendy color or pattern, but WOW, this emerald green velvet sofa rocks.

For me, I'm crushing on this cute recycled glass table lamp from Shades of Light.


How will you add Emerald Green to your decorating scheme?

We're also linking up today with Lolly Jane! Head on over and find some brilliant ideas to spruce up YOUR space!


Nature Trend: Answering the call of the wild

$
0
0


If you're anything like me, you love cute, cuddly animals...when they're cast in cement. I have to admit I love nature...from the comfort of my living room mainly. Seriously though, the great outdoors is definitely a miraculous wonder to behold. And many of you may ACTUALLY be answering the call of the wild. As for me, I unleash my inner beast in more subtle ways: my inner animal and my new bestie.

Apparently, I'm right on trend. Check out what we've seen out and about lately:


Raccoon: Homegoods


Homegoods


White deer mount: Antropologie

Antropologie: Bling Squirrel vases-LOVE!!

Ravensburg Vintage Metal Canisters: Ebay--'Shrooms anyone?

Owl Wallpaper-Who's there?: Antropologie

Old school owl Macrame! OK, maybe not!


Yes Please!!
Concrete bunny bench: Wayfair

Mercury glass acorn
How are you infusing a little nature in your adorable decor?

Join us as we hook up with House of Hepworths today!


Solution for short curtains; DIY room darkening drapes

$
0
0
When we were building our house five years ago, I had a very limited decorating budget and big dreams. I absolutely swoon for custom window treatments. Seriously, I want every room in my house to have decorator-perfect, tailored drapes on expensive rods. Like these........
Pinterest: Dreamy blue silk drapes.
Bam! That was reality hitting me in the face. While shopping at Marshall's one day I came across two packages of ready-made window treatments that I liked. Of course, they were 84" long and those of us with 9 ft or even 10 ft ceilings know that those would hang like high waters.

Solution! I bought both panels and took them to a seamstress and had her add a band of one to the other. Here's an example from World Market, because I didn't take "before" pictures.


Let's say I want the blue curtains, but they aren't long enough. I took the stripe of the second set of panels and banded the bottom to create more length. To hide the seam, I used some decorative trim that I hot glued on. Yep, hot glue.

With the remaining fabric, I made some pillows for the room.

Excuse the mess of computer parts, but here's how they turned out:

To line the drapes and make them a little more custom, I bought black-out liner. This way when we are watching movies on the projector, the room gets nice and dark.

Back tab panels slide nicely on a rod. They DO have a little bit of a sheen to them, which screams, POLYESTER, but remember the budget.

 Trim hot glued to cover the seam.


If you are looking for a nice, soft blue that doesn't read "nursery", my paint color is called "Quiet Moments" by Benjamin Moore. There aren't many quiet moments in this playroom, but the paint is nice!


 The polka dot pillows were also from Marshall's and finished off the room nicely.


I personally never go in this room, unless it's movie night, so I was completely grossed out by the empty Dorito's bags, candy wrappers, and soda cans strewn around. I had a complete hissy fit and made my boys come clean it up. Now to get my husband to do something with that old computer......

Today we're making the rounds of the blogosphere, linking up with:


Chic on a Shoestring Decorating     Liz Marie Blog

Use it or lose it: the Formal Dining Room

$
0
0

Urban Grace Interiors
Wowza! This.is.beautiful!!! When I was a newlywed, THIS was the stuff dreams were made of...what with the 3 full sets of china I got for wedding gifts (and I eloped for Pete's sake!) Now our house is the meetup for most family gatherings and we STILL don't EVER use the dining room. NEVER. I guess the upside of that is that it stays pretty tidy...good news for the first room you see when you walk in the front door! The bad news is that it SHOULD look good and I've dropped some dough on making it that way but we don't really use it.

So I've come to a decision...drumroll please... I will not be having a dining room going forward. For our family, it is truly a wasted space. And since we're moving, now is the time to make the change. Seriously, as we speak my dining room furniture is on my beloved craigslist. (Yep, that was a shameless sales pitch.)  I'm not exactly sure what I'll do since most dwellings have a dedicated dining room. Buckle up and join me for the journey.  Here are a few ideas from some of my peeps:

Like myself, Jacki had the full blown table for ten, complete with china cabinet and buffet, in her last house.
Jacki's former, formal dining room.


After using that room twice in ten years, her hubby made a pilgrimage to Florida (from NC) to get this Brunswick Gold Crown pool table. It's from the 1930's, and has started to grow on her. Like a good wife, she decided, if you can't beat 'em, join 'em and made the best dang pool room her 'hood has ever seen. The paint color is SW Mannered Gold in case you are wondering.
Jacki's Billiards room, otherwise know as the formal dining room.
In case you need to set up a buffet line, all you need is some plywood and a couple of oversized tablecloths to turn this pool table into a wonderful server.

We all know Jacki's a trendsetter... Check out what her friend Kelly did with her formerly unused formal space.


Before: Kelly's Dining Room


After: Kelly's Billiards Room

Jacki's sister-in-law followed suit and turned her dining room into a place where her kids can do homework and they can enjoy displaying books and other family treasures.

Formal Dining Room


X
Um, yeah. This is where the "AFTER" pic should be but it wasn't available at press time (read: Jenny call your sis-in-law back ASAP please!)

I love the idea of turning the formal dining room into a home office. You can still use it for dining on those special occasions.


Check out what Emily Clark did with her dining room:


I love all these ideas! Stay tuned to see what I end up doing at my next home...

Tell us, what's going on in YOUR dining room? Are you USING it or LOSING it?

Linking up with The Dedicated House:

WOW! Before and After: A Tiny Bathroom Lives Large!

$
0
0


You may remember our post a few months ago about the lovely peach bathroom that was screaming for a makeover. Here's where we spilled the dirty deets!

I'm happy to report that the project is finished and for a small space, it is LIVING LARGE!


Can you believe the transformation?


Before the remodel, the shower measured a tiny 22" wide. Eek! How did she shave her legs in there?
Working within the same footprint, but moving the fixtures around, opened up the space to allow for a larger shower. The glass enclosure also makes it feel larger.


The honed Carrera Marble was the perfect choice for the space. A subtle color palette also creates the illusion of space.

The homeowner had a history of leaks in the shower and a fool-proof and leak-proof shower was at the top of his wish list. Patrick installed the Schluter Kerdi Shower Kit to nip that in the bud!

THAT is HAWT!


This was the original design board presented to the client. When you hire Decor You Adore to design a room in your home, this is where we start. From there, all the selections are finalized and a detailed, scaled drawing is created.

Beautiful marble inset framed with pencil molding.
A nice design feature that Patrick added was placing the shower valve just inside the door OUT of the flow of water from the shower head. Now you can stay dry until you are ready to get wet.
Cararra marble subway tile (approximately $8 per square foot)

Floor Cararra mosaic: Approximately $12 per square foot.
 I just have to throw in some more Before picture so you can be amazed:


We chose a bypass door instead of a swinging door to save space and gain an added towel bar. Clear glass was the best choice to allow a visual flow throughout the space. If you have more room, "rain glass" is also available as an option. You can see the Kohler Bypass Door from Home Depot Here.


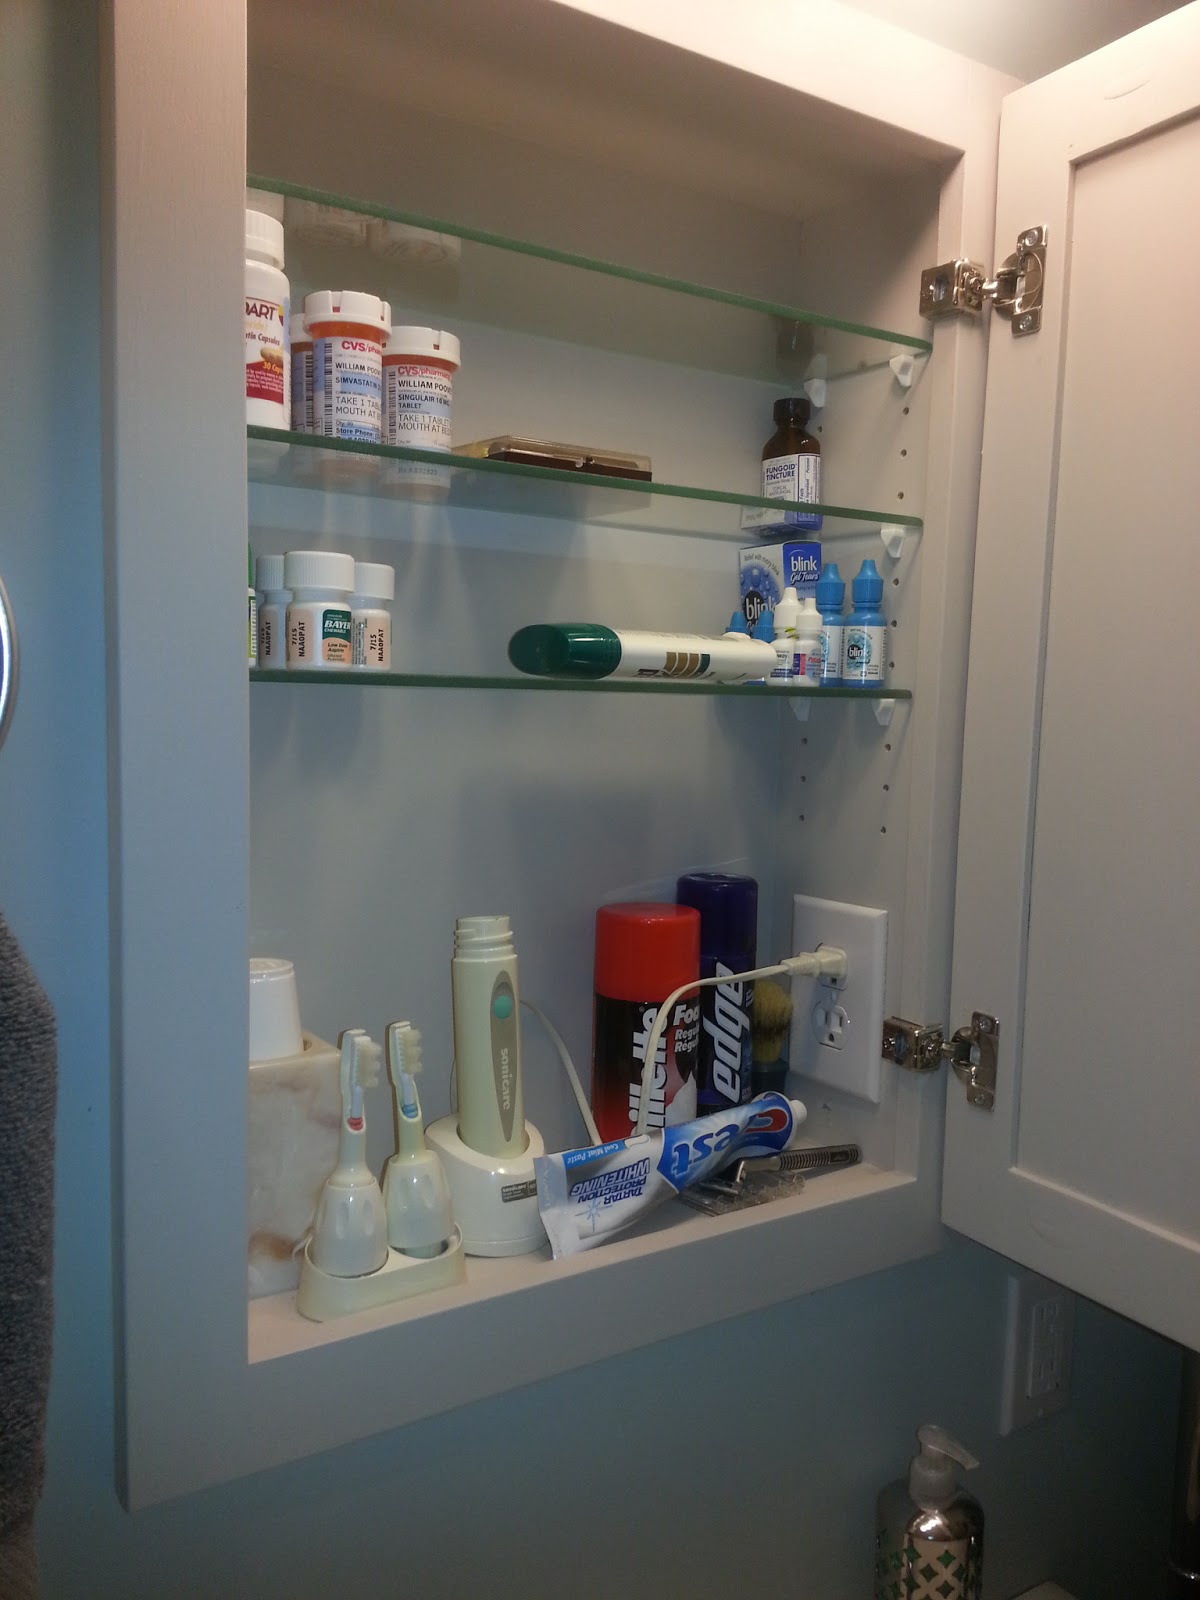
The homeowner custom made this medicine cabinet in his woodworking shop. Don't you love the detail of the outlet inside the door to charge the toothbrush? Brilliant!


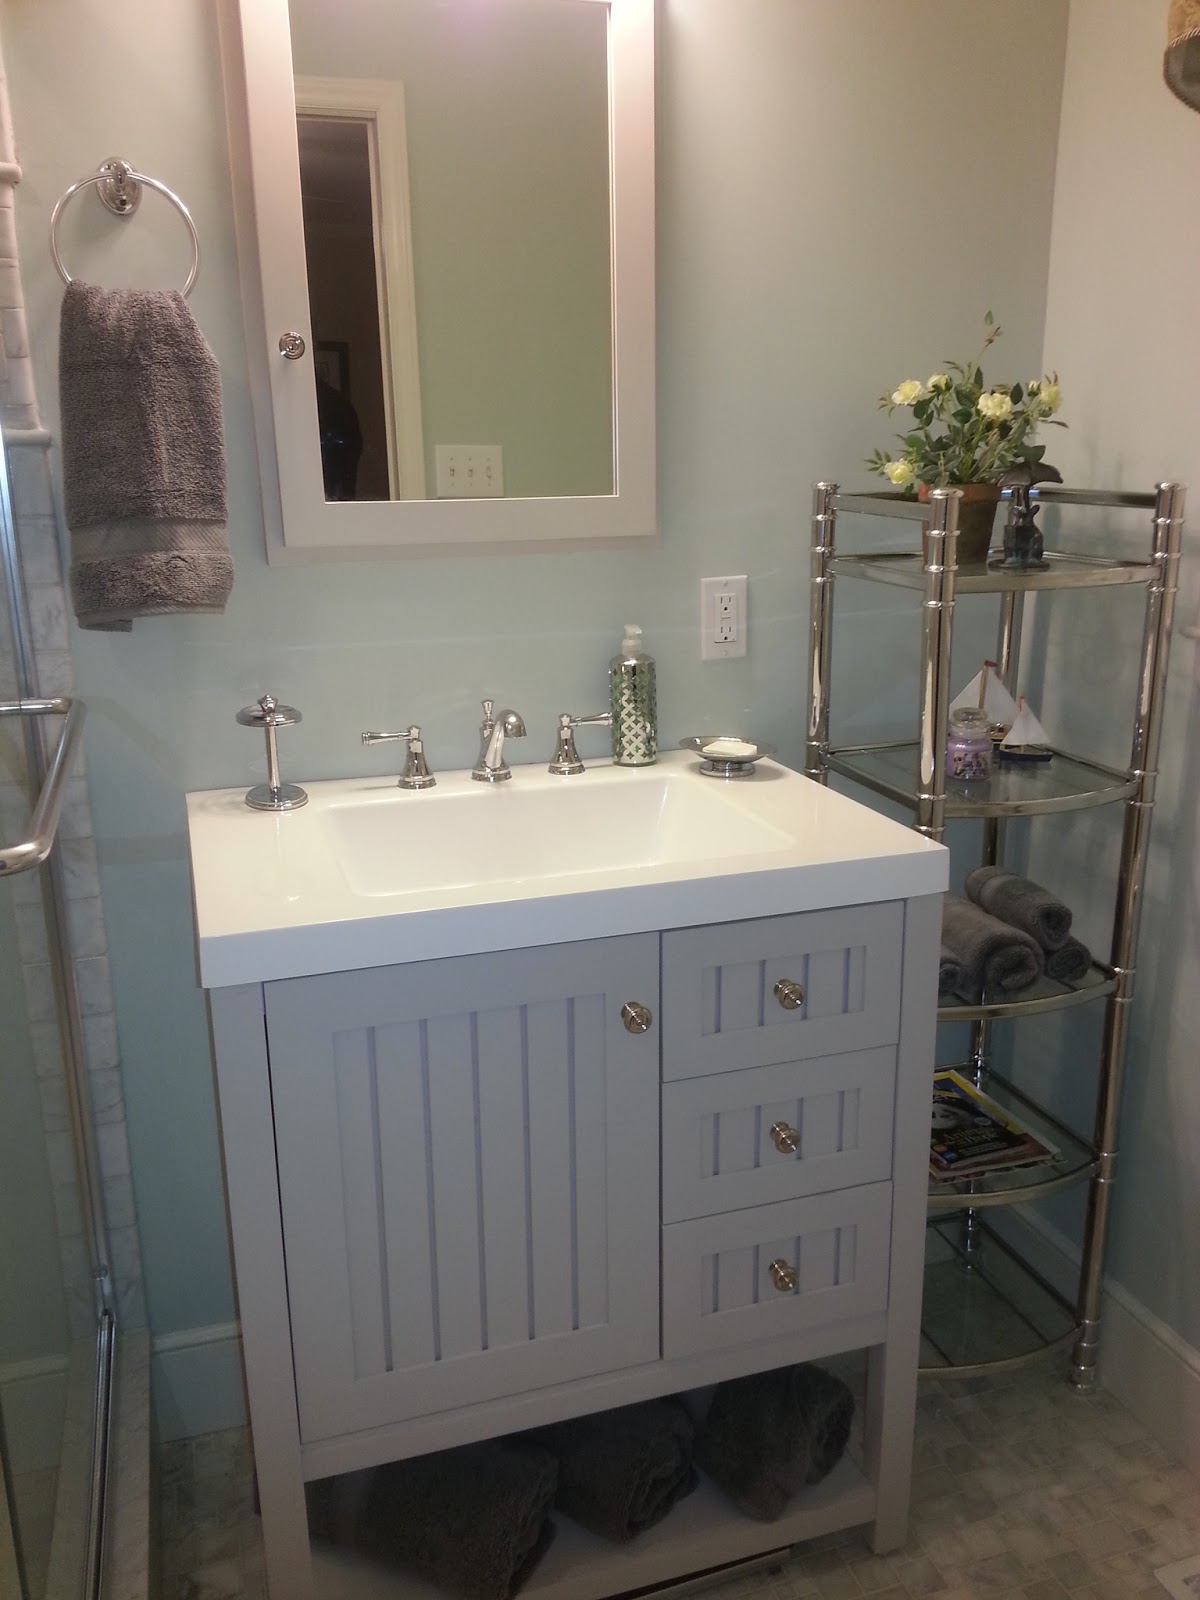
The Martha Stewart Seal Harbor vanity is painted in Glidden Sharkey Gray.

Glidden Sharkey Gray


 The wall color is Sherwin Williams Sea Salt.


 At just $399, this vanity from Home Depot is a great value.


If like the look of this inset toiletry shelf, it was custom designed and installed by Patrick (Poovey Construction). Contact the Decor You Adore design team to have one of these masterpieces installed in your home.


Have a happy humpday adorable readers! Today we're linking up with Not Just A Housewife!

Under the stairs and dreaming!

$
0
0


pinterest

Hey there and TGIF! This is one mama that is ready for the weekend! In an effort to prep for max relaxing, I searched the web to find some great spaces to chill out under the stairs. And some awesome space-saving storage ideas too!

Without further ado:

Isn't this clever? Many of us use the closet under the stairs for storage, but very few do so THIS stylishly!

pinterest

Seriously? You could host a party in this space under the stairs:

pinterest via House Beautiful
#BRILLIANT: How clever is this? #USINGEVERYINCH

pinterest
and, a less intricate yet similar design:

pinterest

OMG!!! To die for....


Along the same lines as the last one..but SOOOO thoughtfully awesome!
pinterest
In a bit of exciting news, we were featured on Anything Blue Friday for last week's post about DIY custom window treatments. Thanks Kathryn for the shout-out. You guys head on over her way if you're feeling BLUE today! And have a GREAT weekend!

Trend Alert!! Quatrefoil baby!

$
0
0

Source
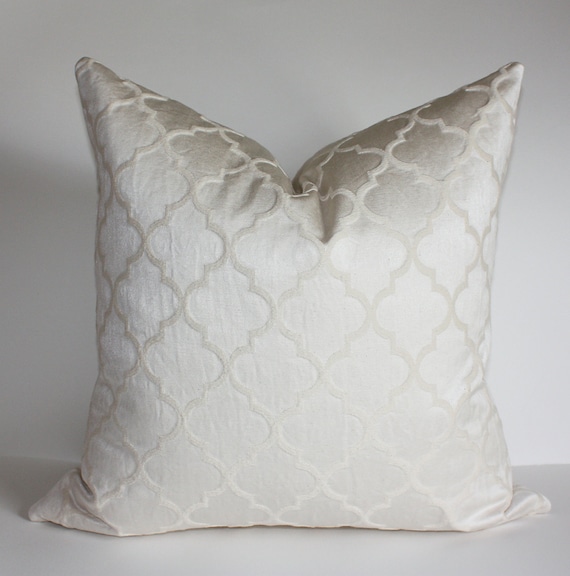
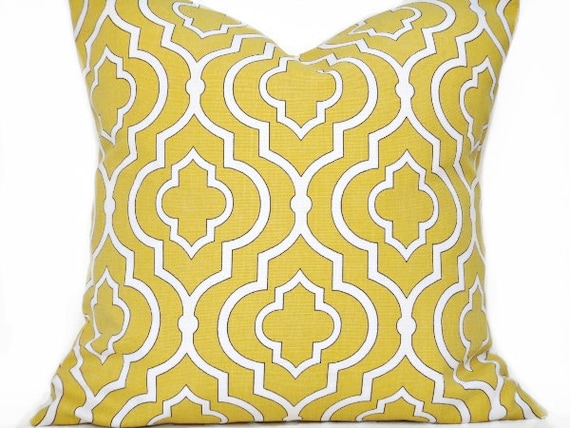
Have you seen all the cool quatrefoil popping up EVERYWHERE? If you're anything like us, this decor eye candy is TOO hard to resist!

Check out this awesome, budget-friendly update for under $20,
Etsy
Or, this D-I-Yquatrefoil wall art:

source
I'm gonna call this more of an "investment"than a cheap update, but man...it sure is dandy!

Pinterest
Get out your credit card girls, you're gonna want to do some shopping. Check out these PILLOWS!!!

Etsy

Etsy

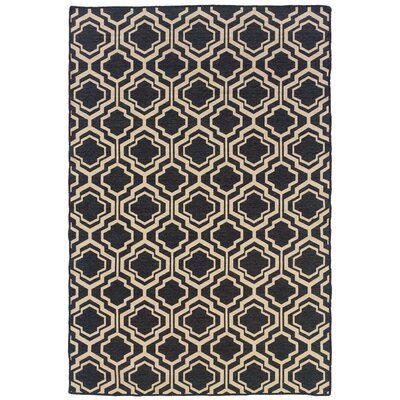
I Loooove this rug...long time. Well, at least until the next trend steals my heart.

wayfair.com

This pendant is totally TDF (to die for)!

source

Yes, please.

source
What can we say? We're jumping on the quatrefoil bandwagon! When Jacki spiffed up this little nook between her master bedroom and powder bath, this quatrefoil wallpaper was the star of the show!


Wallpaper from Lowe's
Are you digging quatrefoil as much as we are? 


We're linking up today with The Dedicated House.

Hanging the TV over the fireplace: To be or not to be?

$
0
0
source
To hang or not to hang...that is THE question for many.

I hate to start the day off with SUCH a controversial subject. Of course a fireplace should be the focal point of a room but can the TV share the spotlight? It sure is convenient because you can see the TV from every angle in the room. But, does it invite more TV watching and less personal interaction? Hmmm....

It should ABSOLUTELY NOT be a tangle of visible cords and components. Here's Jacki's keeping room off the kitchen, a beautiful example of getting it right:


This living room is a perfect candidate for an over-the-fireplace TV placement. It can be a less expensive option than updating your TV cabinet.


TV's over fireplace done RIGHT:

source

source
And there are many ways to conceal the TV:


Here's one of our client's family room. Where IS she going to put the tv? We're thinking over the fireplace is the frontrunner! We'll keep you posted!


Tell us, what do you think of hanging the TV over the fireplace? Does it emphasize TV watching too much?

Today we're Hookin' up with House of Hepworths, head over and check out all their goodies!


Easy Update: Try Chevron

$
0
0
If you are looking for a quick and easy way to update your home decor; try chevron!
Adding a new mirror, some drapery panels or even something as simple as a tray on your coffee table is a great way to update your look without spending a lot of money.

Kristen has a great DIY tutorial for painting a chevron design on curtain panels on her blog here.

I know Catherine has her eye on some chevron details in her new home (wherever that may be); where will you try chevron?

Headboards- Luxurious Tufting and Nailhead Trim--Oh My!

$
0
0

Hello and Happy Monday adorable readers! It's raining here in NC and I just want to crawl in this gorgeous bed--or back in mine! Alas! An impending move waits for no woman!

As I have mentioned, my family and I are in the midst of moving and hopefully downsizing. Therefore, I have been selling furniture like cRaZy! I've even contemplated selling (read: listed on Craigslist) my bedroom furniture in an attempt to lighten up. I've already successfully sold my cherry sleigh bed that I used in our guest room. While it is beautiful, it is also bulky. This is another one of those situations where I used what I already had but I really want something else. I've looked at this little number from Target.
Don't you think that would be so inviting? And for $300, you cannot beat its elegant, clean style. I also like that it doesn't have a footboard because no matter how large your home is, the guest room probably won't be huge.

*IF* I can sell our bedroom furniture, I would love to have something like this in our master:

potterybarn.com
We sit in our bed and use our laptops and watch TV pretty regularly. This headboard would make a comfy perch!

What do you think of upholstered headboards? Do you have one or more in your own home?

Today we're linking up with The Dedicated House. Head on over and check out some great tips and tricks from around the blogosphere!

Let's Play! A SWOON worthy play room.

$
0
0
WE ARE SO EXCITED!  Jacki and I are headed to IKEA (sans kiddos-which is something to be excited about in itself) because we have the opportunity to decorate a craft-lovin', little girl's play room. I'm having to keep a close eye on Jacki because that is her dream child and I'm worried she may try to flee the country with her. I suspect that would be really bad for business!

Our client(s), mom and daughter, want something that can be used by the whole family. Some of their requests are:
  • a place for arts and crafts
  • a place to display masterpieces
  • a dress-up area
  • a place for family movie night
  • additional room for overflow, overnight guests
This is the current playroom:


They are moving the play room to a different room in the house--upstairs (read: trying not to have a Toys R Us downstairs). Luckily, it's a LARGE room and was being used for a guest room and office. 

Here's the before:


You can see from our mood board up top that our vision for this room is bright and cheery! And, we will address the wishlist to make this room fully function for everyone, especially Jacki's little BFF.

We're just getting started so you will have to stay tuned for the finished project. Here's a peak at the room's closet and our vision for the dress-up area that will be hosted in there:


Vision:

Not to mention wall decals and of course, PILLOWS!


OK, seriously, you're as excited as we are... I know it. Thanks for stopping by and come again soon!

Check out our link love--


Viewing all 118 articles
Browse latest View live


Latest Images