Quantcast
Channel: Decor You Adore

Create a space savvy solution in the kitchen~ Add a built in banquette

$
0
0
Have a cramped dining space? A banquette can be your space savvy solution! It can be used as a casual dining spot, homework station, or a resting spot for reading the paper while sipping your morning coffee.
built-in-kitchen-seating
From Pinterest

When there's limited space to move a chair in and out, a stationary seat is the better option. This banquette fits snugly here, but doesn't  appear cramped, as chairs most certainly would.

built-in-banquette-dining
BHG.com

wrap-around-storage-banquette-seating
Pinterest
I have an old headboard in my garage that I've been debating turning into a bench for my farm table. I love this one that I found on the Freddy and Petunia blog

headboard-bench

banquette-ikea-majby-chairs
Pinterest

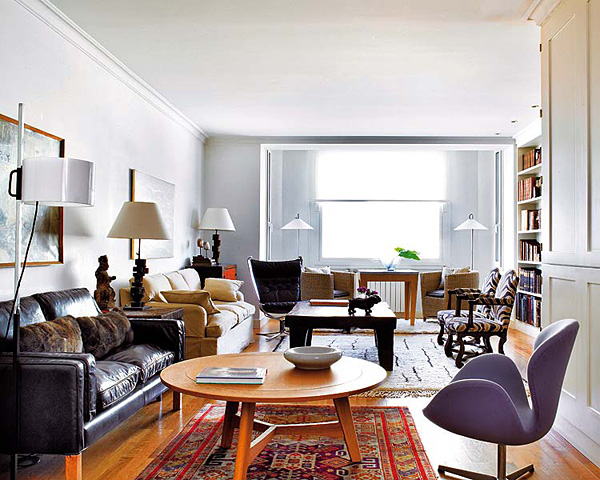
I especially like the look of a corner seating area with a round table. How cozy!

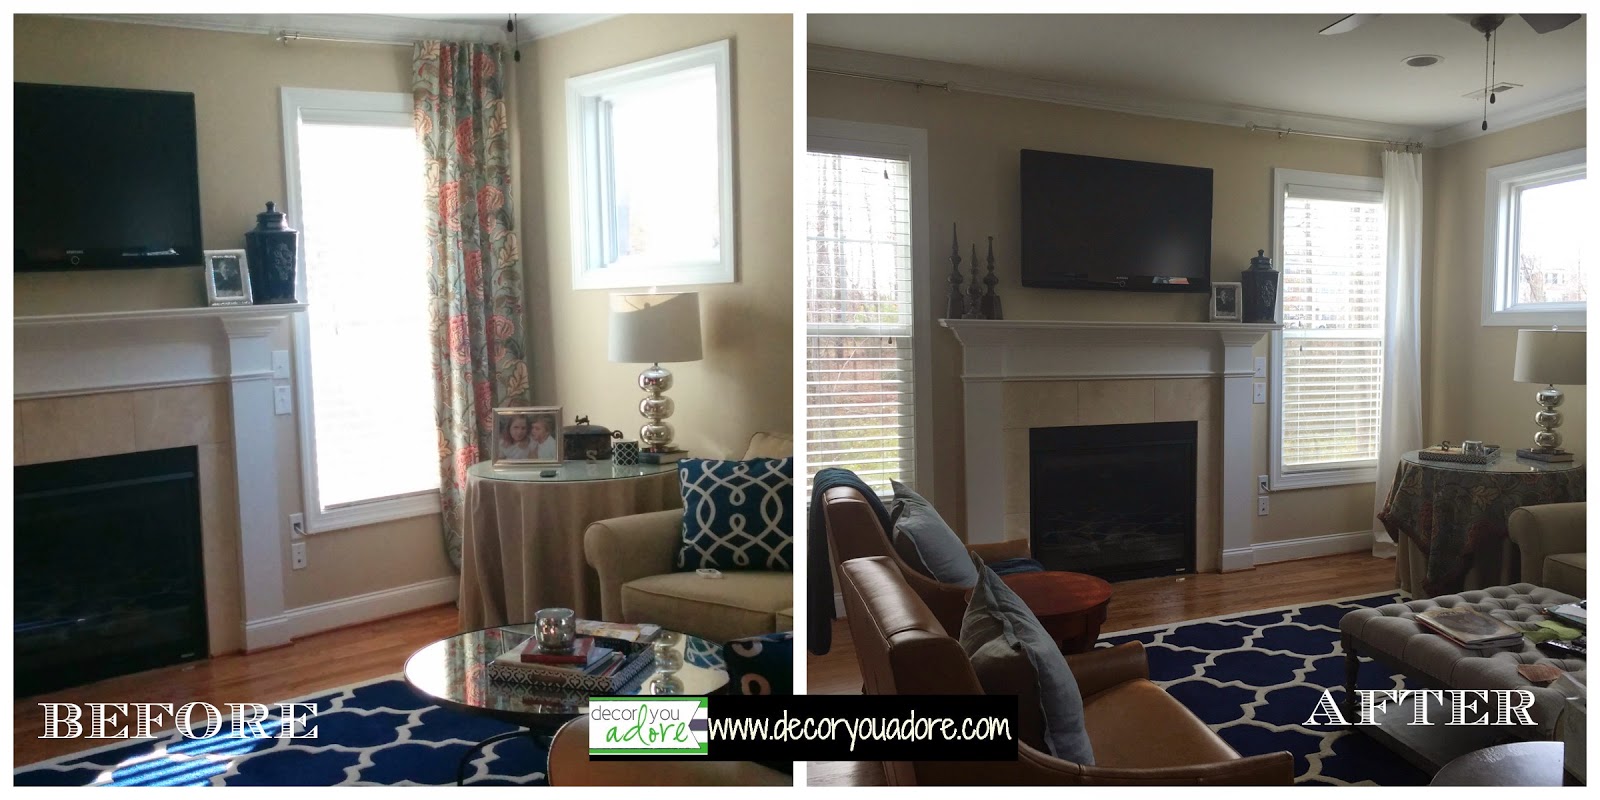
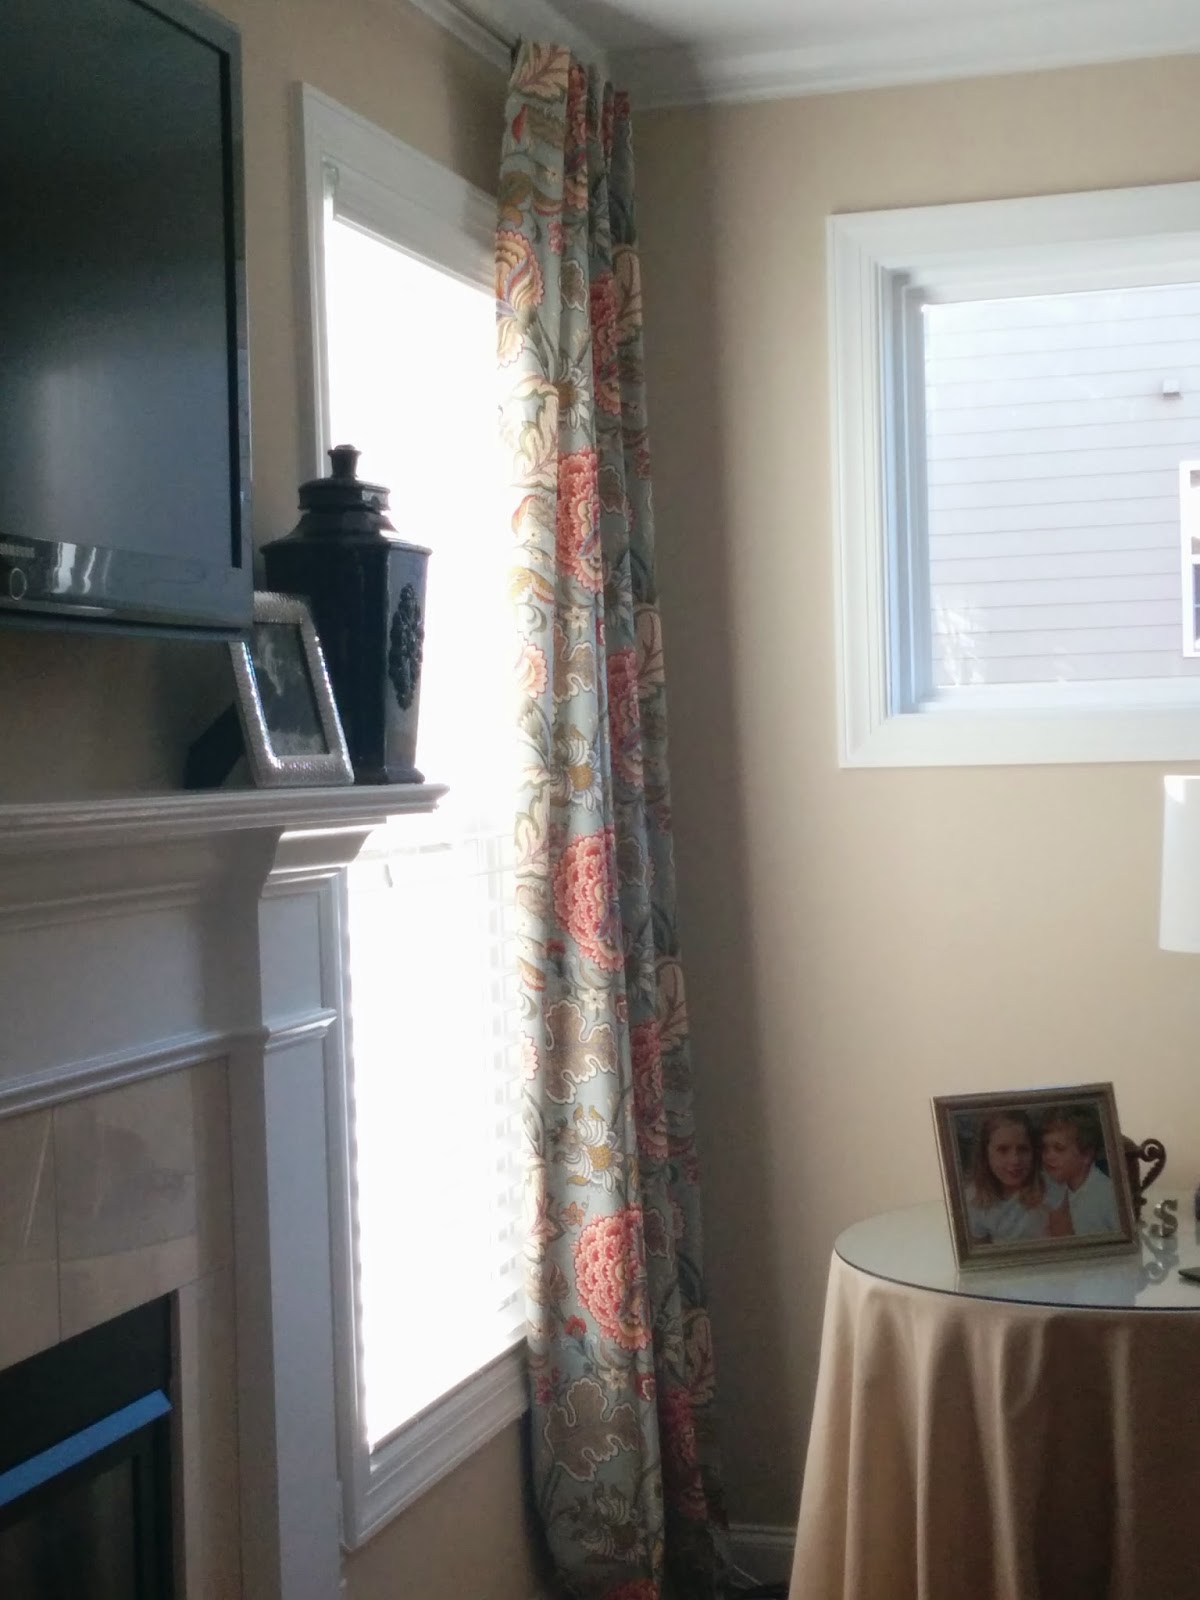
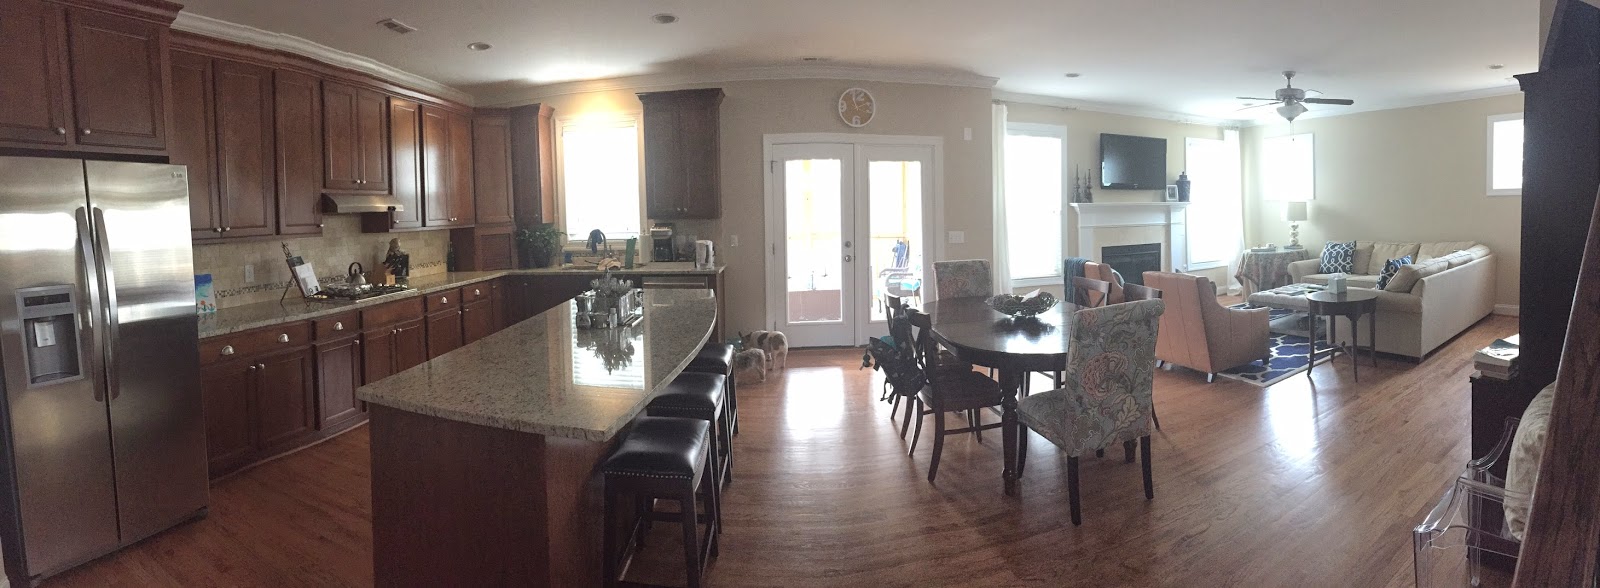
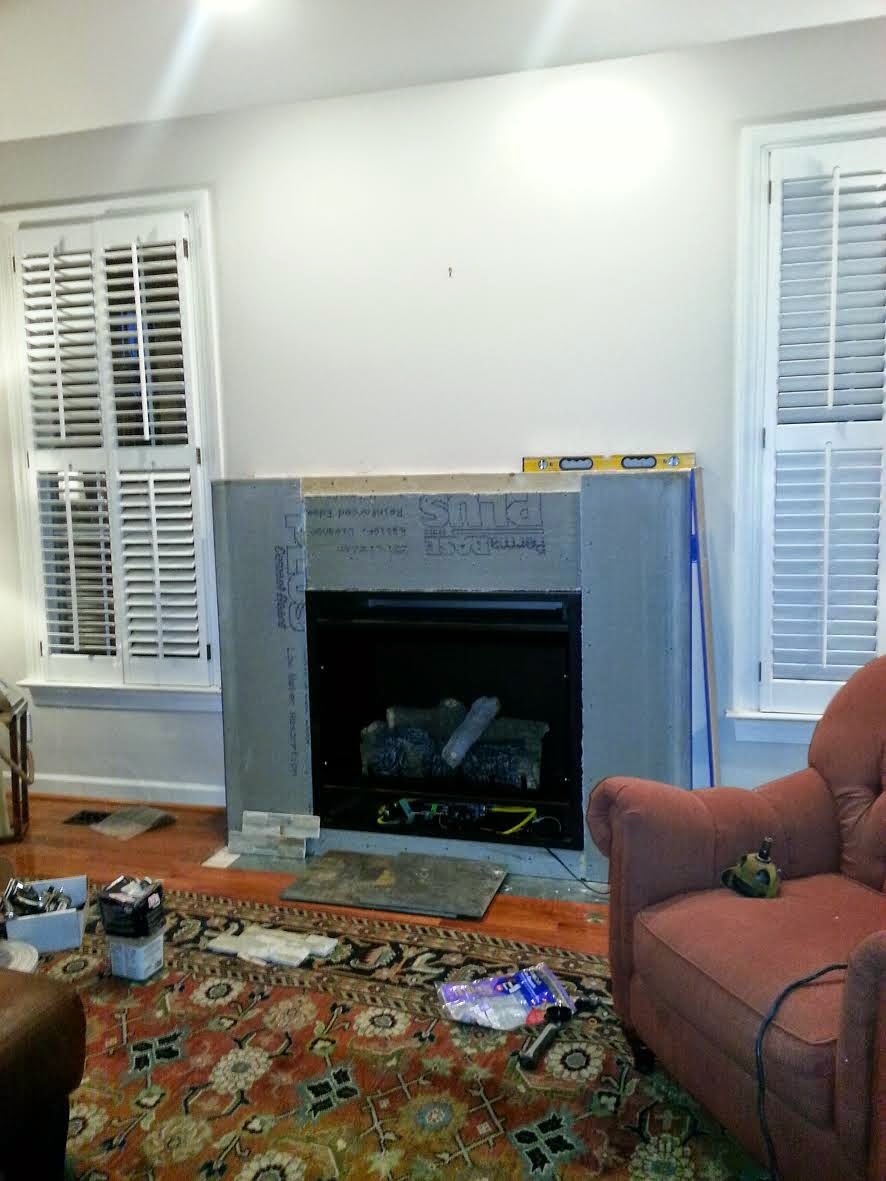
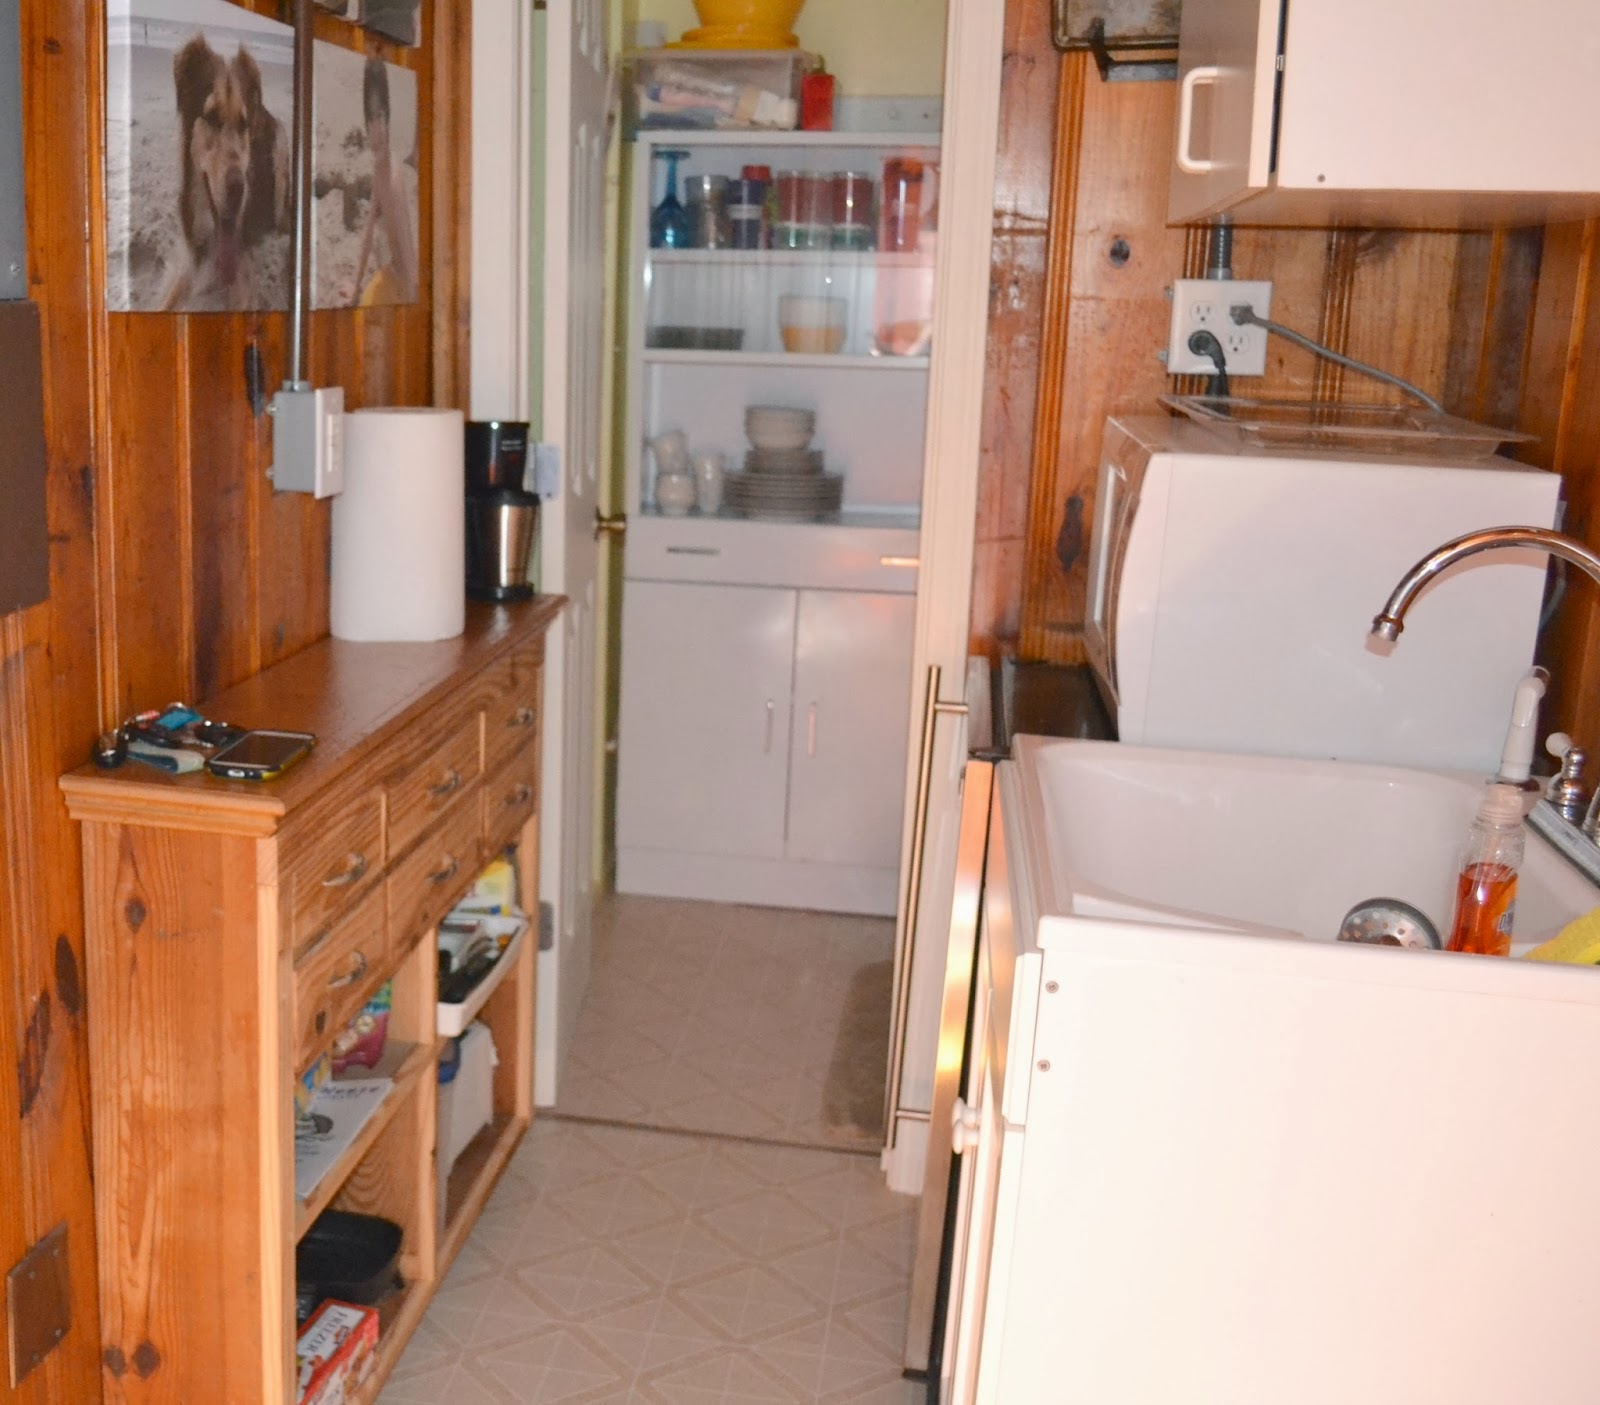
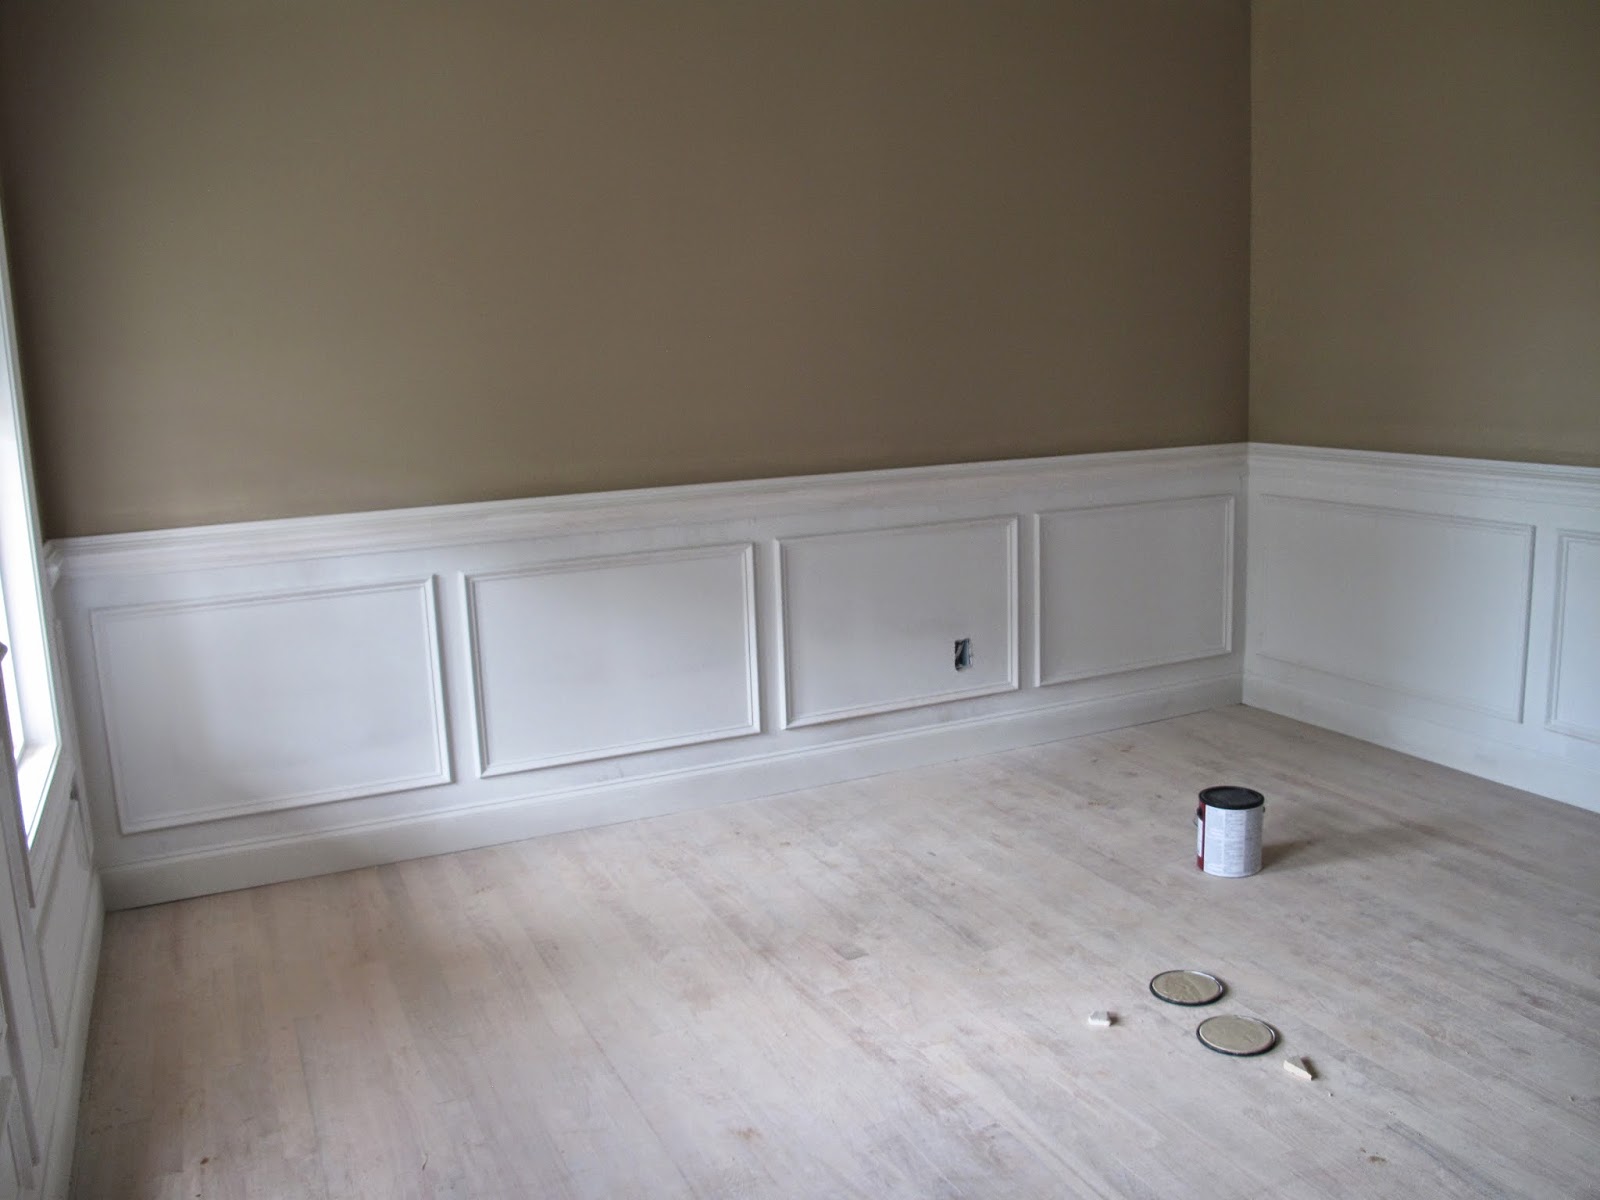
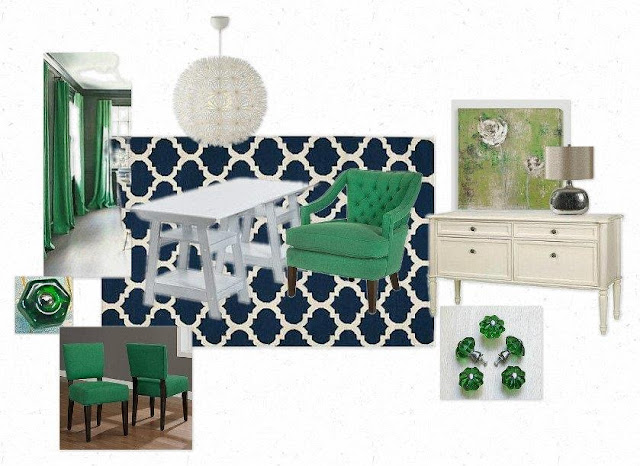
This was the inspiration for Catherine's kitchen nook:

built-in-seating-with-cushion

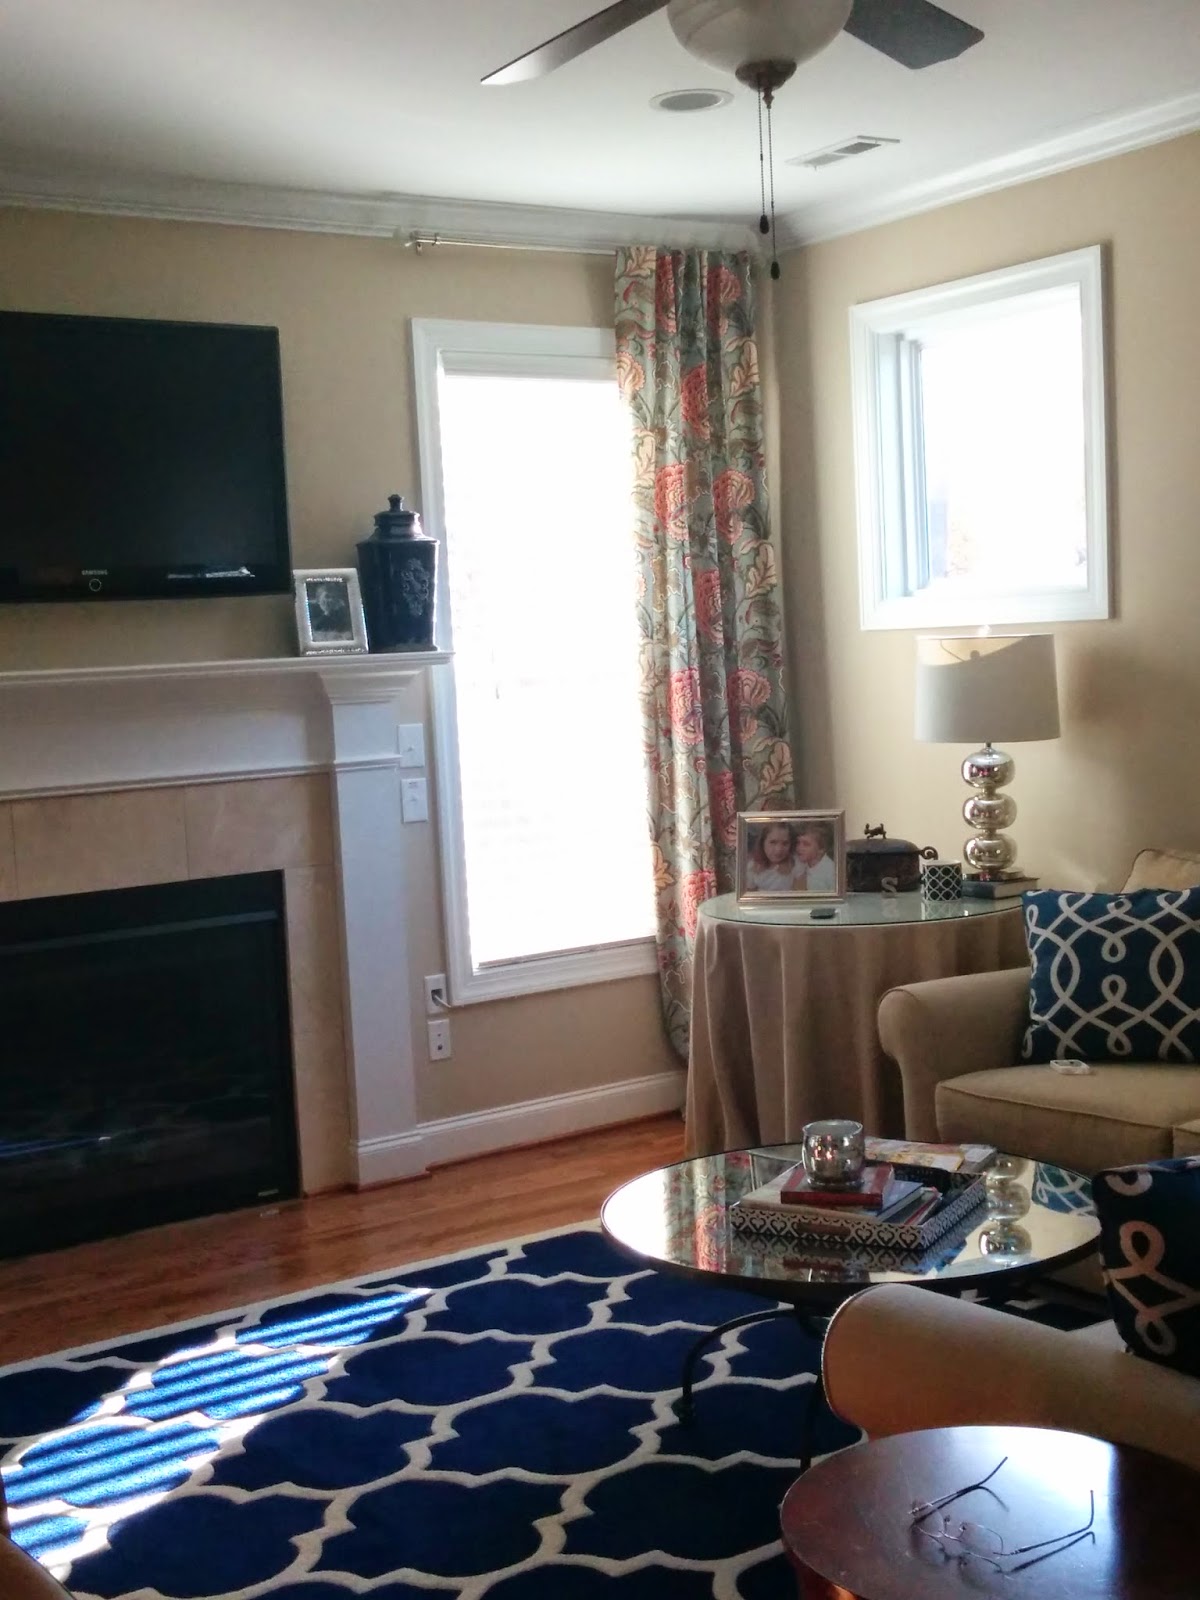
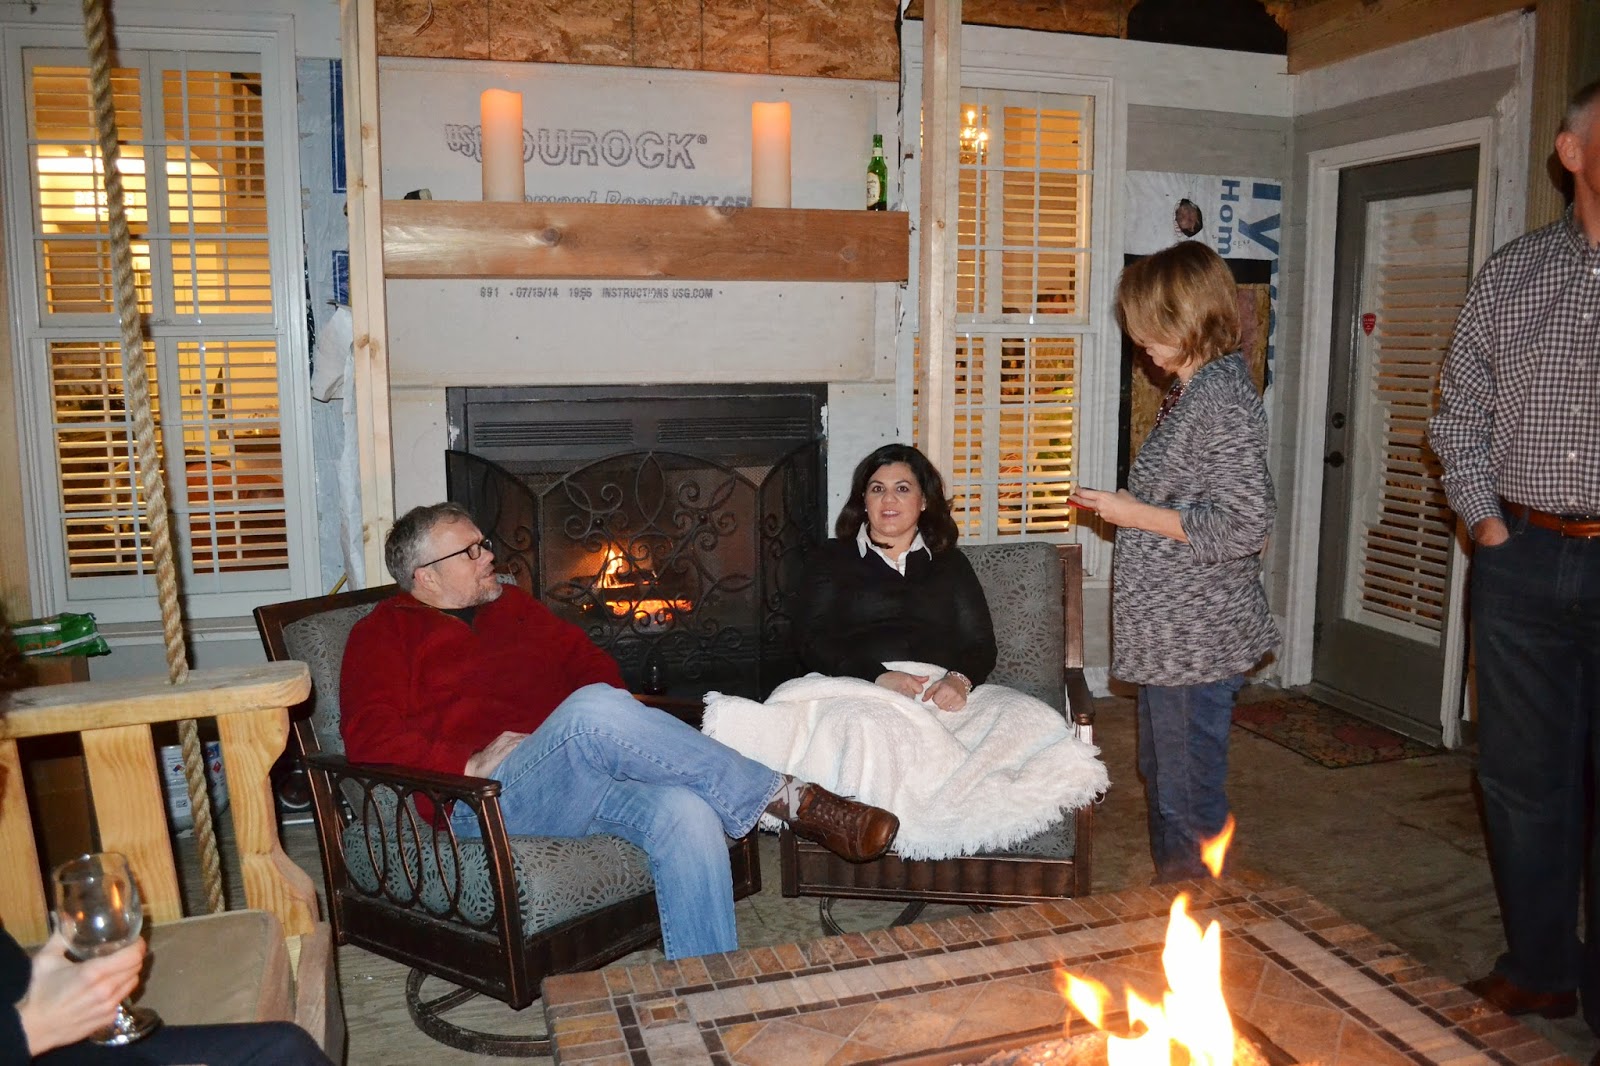
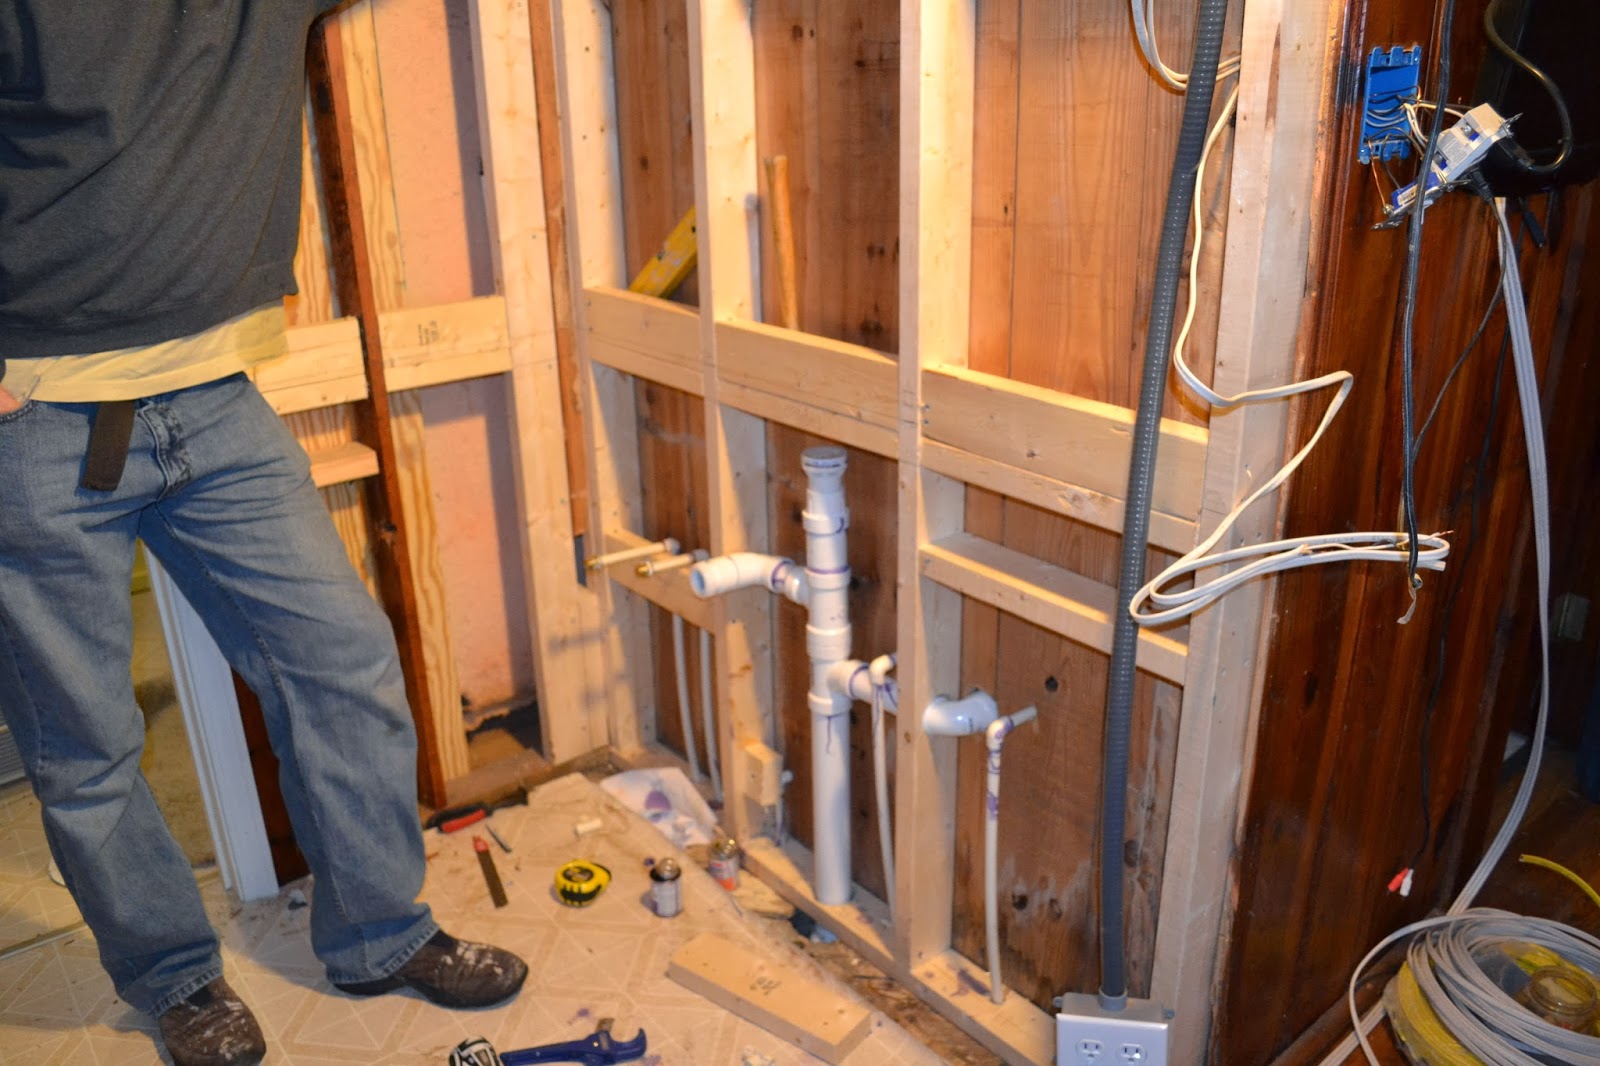
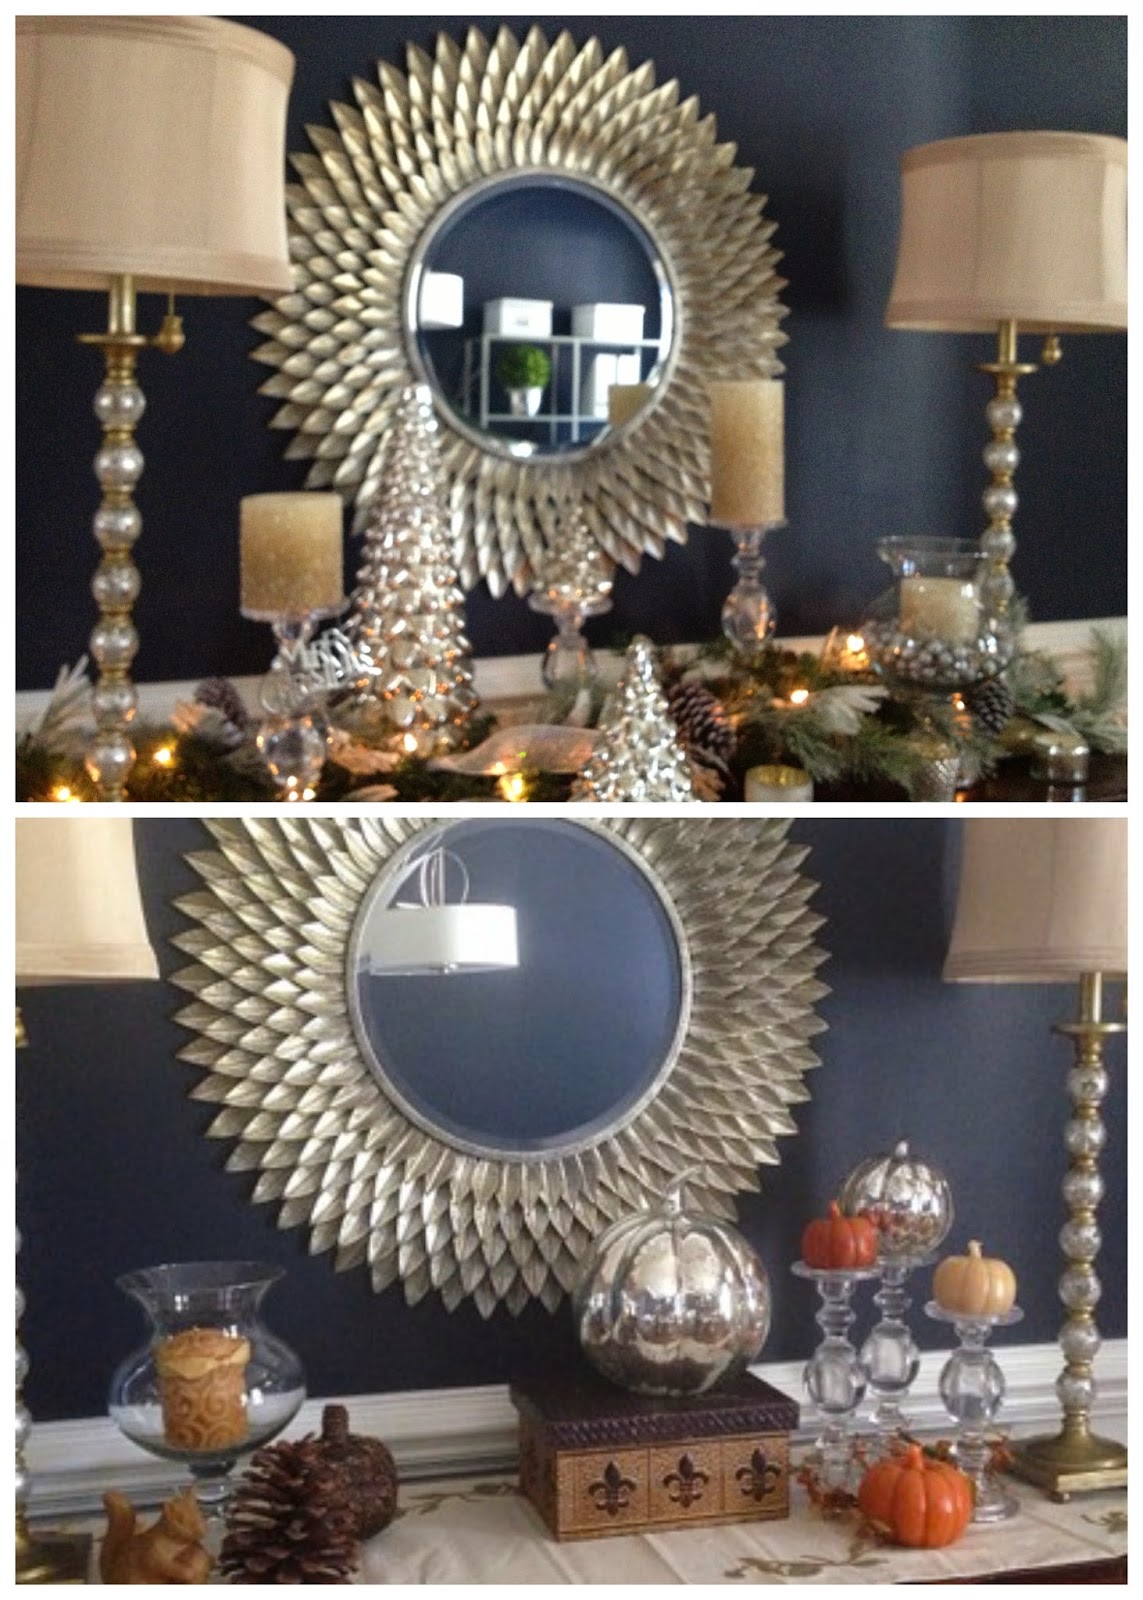
And this is how it turned out:


In case you can't commit to a true built in piece, there are other options. Like this curved, free standing piece from Overcourt.


World Market also has a nice option; the Hayden bench:

Whatever your size parameters, a built in banquette can be the answer to your decorating dilemma. 

From: Style Carrot
Hooking up with:


The Girl Creative
The Girl Creative

How to sell your pet-friendly house to (potentially) non pet-friendly buyers.

$
0
0
There are 78.2 million pet dogs in the United States. One of the sweetest lives at my house. Unless, that is, you are a UPS driver. For whatever reason, Georgia detests our UPS guy. She hears him coming from a mile away and barks until he tosses my Amazon package on to the porch and runs away in fear for his life. 


Georgia, dreaming about a peanut-butter-covered UPS driver for lunch.

The actual odds of a dog attack are in fact 1 in 9,953,955 per year, but people are irrational. My son Ben is afraid of mountain lions and other big cats. He has nightmares that one is going to sneak in his window and eat him in the night. See? Irrational. As if a mountain lion had opposable thumbs and could unlatch a window.

So, here's a little tip for my UPS driver:


FedEx-leaves-treats-for-dog

Yeah, that's right, the FedEx guy gets it. But anyway, on to my blog post about having your house on the market with pets in the home......


selling-your-home-with-pets

Out of sight. Out of mind.

Irrational or not, if at all possible, keep your pet out of the house when you have a showing. Nobody wants an over-eager dog jumping on them when they walk in the door of a home. If your pet must be home, put him away in a crate or closed off area and make sure the showing instructions are clear about his whereabouts. 


Cynophobia: The irrational fear of dogs.

Get Fresh.

People are really sensitive about pets and even the biggest pet lover doesn't want to walk into your home and see or smell your pet. Off-putting pet "aromas" are a darn good reason to turn around and walk right out. So clean the litter box, crate Kujo, clean up poop in the yard and remove all evidence of Fifi's existence. 


Consider hiding the litter box in an out of the way place.

Fur Be Gone.

You spent hours de-cluttering and staging your home, but did you forget abut the pet hair? If you have carpeting that traps pet hair and odors, invest in a good carpet cleaning and have them clean any upholstery too. Vacuuming isn't enough. 


Repair.

Make sure any gnawed woodwork, scratched hardwoods or hole-y weather stripping has been repaired or replaced. Even small areas of disrepair can leave a potential buyer wondering what else has been neglected?

My Swiffer refills are due to arrive today at 11 via UPS. Maybe Georgia and I will wait for him on the front porch. 


Tiny Cottage Kitchen Makeover- Take 2

$
0
0
You may remember our attempt to gain some counter space in our TINY cottage kitchen at Oak Island.


Weeeeellllllllll, as usual, that wasn't enough.

A: I couldn't leave well enough alone.
B: I wasn't satisfied.
C: I am a nut case who is looking for a project.
D: All of the above.

As much as I hate to admit it, if you answered D, you'd be right. 


Cottage Kitchen: Before


Believe it or not, it was actually worse than this originally. The refrigerator died and we found a replacement with an icemaker at a local second-hand place. That was the beginning of the snowball effect. 


Removing the weird laundry sink proved to be a major improvement. Bringing the refrigerator out so it opens into the living room opened up the galley style kitchen considerably. 

Ann-Sacks-twighlight-gloss-subway-tile, Edsvik-Ikea-sink

And the countertops..... Can we talk about the counter space? Ahhhh. SO much better. 
I'm getting ahead of myself. Let's start with the demo. 


It's always fun to take down walls and find that the wall that holds the wall-mounted bathroom sink was eaten alive by termites. 


That, my friends is a chewed up piece of wood. Termite damage is no joke. Luckily, all the little boogers were dead and gone; eradicated by the last people who "renovated". 


New framing. New plumbing. New wiring. 
#TeamPatrick


Our pooch, Georgia, did not like the vacuum. But she's going to love all the new space in the cottage.


Me: Can you just move the sink over a bit?

Patrick: You mean, move the plumbing?

Me: Well, yeah, that's not a big deal, right?

Patrick: (mean face)


Fast forward a few days and these two butts are under the cottage running pipes, electrical and other various ugly things that I don't care about. 

I'll make a (not) quick road trip to Charlotte to get the fun stuff. 


The Ikea Numerar Beech Butcherblock Countertop was actually IN stock. Everytime I check, it's out of stock, so there must be a lot of these counters in North Carolina. I am SO curious what everyone used to seal them. 


 Ikea Edsvik Faucet. How cute is this little guy? He's so retro and vintage and charming all wrapped up into one inexpensive faucet. 


Ikea Fyndig Stainless Sink with Drainboard. No, there's no dishwasher in the cottage. The green side of me hates using paper products, so I figured I'd get a drainboard to encourage hand-washing. 


Ikea-edsvik-Ikea-Fyndig-sink-Numerar-countertop

Remember the score of the century, the gigantic lantern light fixture from the Durham Habitat store? And the Cheetah captain's chairs?
Well, this glossy subway tile has moved into first place in the category of awesome Habitat finds!

 $0.18 a piece. $9.00 a box


Ann-Sacks-Gloss-Subway-Tile-Twighlight-Gloss

This image is on the Ann Sacks website but it does not do this tile justice. 

In some lights it looks gray, and in some a little green, or even aqua. Depending on where you stand in the room and the light coming in, it reads blue-gray-white-green-aqua. Amazing tile! 

I hope Patrick bought enough for the downstairs beach bathroom. Even if we have to order some more at full price, it will be worth it~
I want this tile everywhere! 


Ann-Sacks-twighlight-gloss-subway-tile

beech-butcherblock-countertops

After reading and re-reading many, many blog posts about how to seal the beech Ikea Numerar butcherblock counters, we decided to use Waterlox. I think Patrick put on a total of five coats, letting each dry thoroughly in between. 
It was not a fast process, but we rent the cottage in the summer and I wanted these countertops to LAST, without having to worry about oiling and re-oiling. 

ikea-numerar-butcherblock-countertop-waterlox-sealer

Finally, I have a fun surprise! Patrick set up the GoPro camera and did a time-lapse video of the entire project. In just a few minutes, you can see how the whole thing went down. Just push the play button and enjoy. I love it!


Cottage Kitchen Update on Youtube

A Rec Room for the Whole Family!

$
0
0

I'm sitting here in the ice contemplating yet another #snowday with the kids and dreaming of sunny days on the beach. In the midst of refereeing, I'm working on a project for a client.   

This family has a bonus room over their three car garage. It needs to grow with them and evolve as the children get older. They didn't want it to be too juvenile, because the adults in the family want to spend some time here too. First things first...paint.

We'll start with a wonderful green/gray paint color called Cashmere Grey by Benjamin Moore. 


benjamin-moore-cashmere-grey


Let's go through each task of this hard-working room.

Homework & Study Area:

180 nights a year (give or take) there will be butts in a seat doing homework. While this sweet set-up looks fantastic, I actually HAVE three kids. I know good and well that they can NOT sit next to one another during homework time. Nope, even if they don't throw punches like my boys, we'll put these girls on opposite sides of the room.


Each girl will have her own craft and art area in the room with pegboard storage. You might remember we did something like this for another lucky little girl


pegboard-craft-desk

Homework Desks: Ikea Torsby tables, glossy white with chrome legs.


ikea-torsby-table


Play Space:

After all that homework, the girls will need somewhere to play. My suggestion is to build a little nook like this one under the eave. 


The back of the door makes a nice place to store Barbies. 

Now for some grown-up fun! 

This wall is reserved for the 12 foot media screen. It's the perfect place in the house for the Home Theater. 


Of course budget played a key factor in furnishing the room. Regardless of popular marketing strategies, you don't have to spend a fortune and it CAN be decent quality. One of the benefits of hiring a designer, is the guidance of when to SAVE when to SPLURGE. 

This media console definitely falls in the splurge category at $600. But, it's modern lines and chalky grey color make it a perfect candidate for behind the sofa. The board games and puzzles will have a nicely contained home in this versatile piece. 


Bonus: we can put lamps on it.


One of the (most important) ways this room will function is as a media room after the addition of a projector. Therefore, comfortable seating is a must have. Believe it or not, this is actually where the "save" comes into play. 

Would you believe I found this sectional at Big Lots? 


I am not above taking the cushions off and getting "all up in there" to inspect the construction of a piece of furniture. I hate when arms are insufficiently padded, or when the cushions are crap that will break down two months after you bring it home. 


This one passed my five-year-test. (Read: a fair-priced piece of furniture needs to have a life of about five years and then still be worth something on Craigslist.) Now, if this were my main family room, we'd be talking a quality sofa with real longevity, but this is a room that will be used by children. I get that; my kids have jelly hands too!

It's made by Simmons and at $700, it's a great choice for a young family who may not want to invest in their forever pieces just yet. 
With a reversible chaise option, the ottoman can slide to either end making it very versatile. 


More Saves! These custom made pillows are made from an adorable dandelion print and cost just $20 each on Etsy. 


To define the room, I like to use an area rug on top of wall to wall carpet. This can freak budget-minded people out a little bit when I try to convince them to put a carpet on a carpet. Trust me, I say! You will find it worth every penny. It's like choosing paint colors. It's my gift. (I have earned these bragging rights).


marcello-pear-gray-blue-modern-rug


I'm not usually a huge fan of grommet topped panels, but I think the value outweighed my dislike of the grommets in this case. These are blackout lined 96" panels for $35 each. Since we need four for fullness (two on each side), these are winners!


blackout-theater-curtains

The two single windows will get some sort of Roman Shades which have yet to be selected.


To cozy up with the people on the sectional, this club chair from Home Decorators will be a nice addition.


Home decorators has a lot of good options for accent seating. Just make sure you read the reviews when you order online.


I put the "safe" choice in here as a neutral colored chair and ottoman, but what I really want to use in this fun play space is the Chloe chair from Macy's. If you can't have some fun in a rec room; then where can you?
macys-chloe-chair-celadon

SPLURGE ALERT!

 The Arhaus Holden Coffee Table:


Is it worth it?
arhaus-bluestone-table

The bluestone top lends timeless quality that your children won't can't destroy.

FINISHING TOUCHES:

In any bonus room there are 8 miles of wall to fill. Luckily the projector will take care of a huge chunk of space but what about the rest? Artwork!

Vintage travel posters make great artwork.


Another secret decorating genius?

A calendar!
vintage-travel-poster

The frames may cost you some money but the result is semi-custom, inexpensive art that can fill a large wall in high style.

One of the great things about our Some like it Haute package is that we give you the roadmap and you can implement the plan in stages or all at once-HGTV style! This allows you to go at your own pace as time and budget allow. 

I'm looking forward to presenting this one to my clients. Everyone needs a room like this. Fabulous. Functional. Frugal. Yes!


Quick Fix: Dress up $10 curtains with ribbon

$
0
0
Where can you find two 98" crisp, white curtain panels for $10? Ikea of course. If you want to jazz them up a little while still staying within a budget, try adding ribbon. 


Vivan Curtains

You may remember we used the Vivan curtains in Catherine's daughter's new "tween" room. They look great without embellishment too. 

Again, a great look alone, but if you want a little extra umph........

If you aren't a fan of pulling out the sewing machine, ribbon can be glued on or ironed on with hem tape. Now, come on, you CAN do that. You have to iron the Vivan curtains anyway when you pull them out of the package. You might as well add a little embellishment. 

ribbon-banded-curtains

Here you can just catch a glimpse of the sweet pom, pom trim on Catherine's daughter's curtains. 


ribbon-trim-roman-shade

The look doesn't have to be juvenile. This sharp black on white ribbon trim bumps up the sophistication in this room.


Good tutorial on "little black door" blog.

So if you are looking for a fresh new look for spring, try adding some ribbon to dress up you curtains.

What is Faux Bois?

$
0
0

Bring a rustic, earthy wood grain look into your home using Faux Bois. French for "False Wood", Faux Bois items appear woodsy and rustic, but are often cast from cement, plaster, or resin. No bugs or fire hazards here, faux bois items can bring a rustic-chic vibe to any home.

faux bois wool rug


faux bois kitchen canister


Michael Miller Les Amis Faux Bois Stripes Tan Fabric


Faux bois modern leather chair


Feeling creative? 
Try this Faux Bois technique from MarthaStewart.com


teal faux bois stool

faux bois rustic wallpaper

These are some of my favorites; what do you think about faux bois? Do you have a project you've done using this technique? Do share!

To match or not to match? That is the question.

$
0
0
lmbinteriors.com
You'd have to be crazy (like certifiable!) not to covet this sanctuary. And, if the post title didn't tip you off, it would've taken you a hot minute to notice that these nightstands don't match.

Right now, I'm working with clients that are really into symmetry. Trying to convince them that their nightstands don't have to match has been...um...challenging. 

I love a little dimension in my decor. My first "student" was Catherine. When we met, she was a newlywed in her first home, trying to nest, while using her new hubby's bachelor pad decor and a few pieces she had acquired...on a limited budget. Dang! I'm good but a miracle worker? While I don't have pics of her first attempts at asymmetrical symmetry, here's where she is now:


Nicely done!

If you're struggling with a few pieces that don't match (yea!), here are some tips for pulling it all together...stylishly.

Pair similar styles

Centsationalgirl.com

Similar doesn't mean same. The nightstands can relate to each other in some way to create a sense of cohesion. 

Perhaps one is a mirrored piece and the other has mirrored hardware. One may be a laquered chest with brass hardware and the other a traditional chest, also with brass hardware. Another safe bet is to choose pieces from the same manufacturer line. Often furniture companies will offer an open leg-style nightstand, and also a sturdy chest. This option offers similar style details without being matchy-matchy while adding depth of design (read: a more polished, designer look). 

Utility vs. Style

Another part of the decision is the functionality of the room. If you need storage, you're not going to want to do a leggy desk and a skirted table.

Now, that you've found your two pieces of furniture, how do you make it look like they were meant to flank your bed?

Here are a couple of tips (I said tips, not RULES):
  • Height Symmetry
    Make sure the two pieces are roughly the same height
  • Match your lamps
This isn't a hard and fast rule, but if you are trying to tie your nightstands together with the room, a matching pair of lamps is a safe bet. If the lamps are a similar style but not exact, you can try matching the shades. 

balancinghome.com
  • Match the art over the nightstands
To enhance height (ALWAYS a good idea) and visually balance the wall, this picture shows a mirror over the nightstand. Not only does it add another layer or dimension, it bounces light around the room.

House Beautiful


Got just one?

If you have one piece you love and you're distraught because you can't find its "match", try a skirted table like this one from Ballard Designs:

Their Terrific Trio (table, skirt and piece of glass) offers an affordable option to another piece of wooden furniture. Their skirts come in every color under the sun. We suggest a solid skirt and then adding a topper (54" piece of square fabric) for a soft, layered look.

I hope these simple suggestions have given you just enough motivation to look around your home and repurpose a piece you never really liked in the living room anyway. If you can't bring yourself to go asymmetrical in the Master bedroom, try it in your guest room first. Good luck!

Ghost Chairs? Yes, please!

$
0
0

Tiffany Leigh Interior Design

How cool are these chairs? Inspired by the classic Louis Chair, these affordable knockoffs are popping up everywhere!


They're stackable and come in a variety of hues.


They are perfect for smaller spaces because they take up almost no visual space AND provide extra seating. 


Homedit.com
They are a great way to add some texture and interest to a room by adding a pillow or small throw.


Homedit.com

I added one next to my stairs for all these practical reasons.


It sure did come in handy for all the guests we had over Christmas!


What do you think of this trend?


Dining Room or Office? Office or Dining Room?

$
0
0


In my last house, we had a great dining room....


...that we hardly ever used. 

In fact, we wrote an entire blog post about the Dining Room Dilemma.

I spent gobs of time & money on furnishing and accenting the room because it was the first thing you saw when you walked in our home. 

When we moved this summer, I was determined not to have a room that wasn't used. Since we downsized some, that wasn't really an option anyway. 

Here's the layout for our first floor:


As you can see, the "dining room" is again the first thing you see.

I was so inspired by this picture from Duo Ventures.


How perfecto is this space??? The paint, the credenza, THE SHELF STYLING!!!! 

I love it all.I don't have a ton of black furniture so I wasn't thinking about using gray as my neutral. I've always loved NAVY so I decided to go for it. At the front door no less! 

Here's the blank canvas:


And, I mean B-L-A-N-K!

Here's what Jacki whipped up as a guide:


I love the emerald accents but I'll tell you, for the Pantone of the Year 2013, it sure was difficult to find any in home decor.

It all starts with a little paint, Sherwin Williams for Pottery Barn, Naval.


Here's how it turned out:


This room gets a lot of light and has white wainscot so the dark paint was not overpowering.


Still working on the shelf styling but I love these Ikea Vittsjo Shelves that I painted silver:


How cute is this guy? 


For the "foyer" side of the room, I found this buffet on Craigslist. It is perfectly accented by lamps & a mirror I already had.


It is a great place for a seasonal display:


I'm still looking for a rug, some curtains and a piece of art for over the credenza behind the desk. Maybe a lamp too. But, I couldn't wait to share the progress with all of you. 

What do you think so far?


Beautiful Spring-blooming Arbor

$
0
0
Since prom season is upon us, I thought I'd share these pics of an adorable couple (our next door neighbor and her boyfriend) posing under our arbor. 


I mean, really, could they be any more beautiful?

As a matter of fact, yes!
 
My handyman husband, Patrick, built this when we were in our last house and when we moved, it came with us. 
 
 
My dog, Georgia, photo bombed my photography session here.


Lady Banks roses need a little help to attach themselves, but make a beautiful statement.
 
custom-wood-arbor-bench-seats
 
The plant on the other side of the arbor isn't doing quite as well.
 
If you'd like the plans to build one of these yourself, I'll have to climb in the brain of my creative husband and draw something up for you. It's a combination of about six different photos I showed him. (And it was ten years ago.)

climbing-hydrangea-vine
The climbing Hydrangea vine, which can tolerate some sun, isn't climbing as high as I had hoped. I know it needs some sun to flower, and it has enough shade to keep the foliage happy, so what is up?
 
natural-wood-arbor-two-seats
 
It's been in the ground for six years and has ONE bloom. Can any of you green thumbs tell me what I'm doing wrong?


One lonely bloom on the climbing hydrangea vine.

 
lady-banks-roses-on-wood-arbor
 
I'll share a little tidbit about my husband and I: we are CRAZY for copper. Copper lanterns, copper bathtubs, copper roofs, copper gutters; basically anything copper.

garden-arbor-copper-trim

He custom designed the arbor to have curving copper pieces that will weather to a pretty, green patina.


Even the post caps are copper. I thin he would copper-plate his car if he could. I'm going inside now, as the pollen hasn't quite made it's way North just yet. Hope you all enjoyed my Spring photos!

Flippin' out over beach house shutters

$
0
0

You all know that I love the beach. We have a little piece of paradise and I try to get there as often as possible. If it weren't for that pesky little thing called income, I'd pack up and start my career as a beach bum today!

Alas...as many weekends as possible and a stolen week or two it is...for now!

Over the winter I decided we needed to amp up our curb appeal by swapping out the plain jane shutters for something to flip for! 

True to form, Patrick turned my stroke of genius into reality by building flip flop shutters...


Then we painted them to match the current color scheme of the beach house.


And I added some details to make them AWESOME!


Georgia carefully supervised the Flip Flop Ops!

Good job Mom & Dad!
Ready to hang!


One up and two to go!


Ahhh...mazing!


Step up your Staircase!

$
0
0

Are you looking for an inexpensive update for your 90's home?
If you have the typical, builder-basic oak banister and painted white spindles, why not replace them with iron?

Remember this room from our Use it or Lose it, formal dining room post? Kelly replaced her spindles with beautiful wrought iron balusters.

You can visit a home improvement store with photos of your existing stairs and a count of how many spindles you need.
Cascade Stair

Wrought iron spindles come in different colors and designs to compliment most any home style.

View Along the Way


When it comes to new construction, I'm not a fan of the "plank" but if you have one, wouldn't it look better in iron?


If you're up to it, Interior Design Info has a list of steps (all puns intended) on how to replace the spindles yourself!

Denver Finish Carpenters
Step 1:
Once you have picked your new wrought iron spindles, you need to remove the existing spindles. Cut each spindle only 3/4 through around the middle to prevent the stair spindle from falling out. Once a section is cut, grab at the cut point and pull it towards you.

Step 2: 
Remove all of the unnecessary nails using pliers and discard the broken stair spindles.
Oval iron. Houzz.com
Step 3: 
Measure the space between the hand rail and the floor for each new spindle individually, then add 1" to 1-1/4" to each measurement. Cut the bottom of each spindle to the correct length.
Step 4:

Put the new wrought iron spindle in the hole of the old spindle by putting the top of the spindle in the hole first, then add a shoe to the bottom.
Step 5:

Glue the top and bottom of the new wrought iron spindles and shoes using epoxy.

Budget can't handle 60 new wrought iron spindles?  Try paint!


Layla, from The Lettered Cottagehas step-by-step instructions on how to take builder-boring spindles and give them some flare!


The use of black paint in a traditional setting is particularly stunning. Here, they painted the banister, the newel posts and the spindles in black. 

Source unknown


Painting just the banister and newel posts black is a clean and crisp look. Anyone can accomplish a simple update like this one. 
Side note: The whitewashed floors are fantastic too! Having a blond dog makes me question my decision to go with dark floors!

Many homes built in the last couple of decades have the pre-fab stair kits where the spindles are not installed into the stair treads. By painting the top banister and the bottom "rail", it gives the staircase a more updated and custom look.

If you are feeling bold, why not do both? This version features black, painted newel posts and banisters and an installation of iron spindles.
Source

If you don't care for scuff marks on your stair risers, paint them black too!

When used sparingly, black in your interior provides drama and sophistication in design.

Painting your banisters black is a quick, easy and budget-friendly update you can do in a weekend!

Adding Custom Cabinetry With an Existing Fireplace Surround

$
0
0
built-ins-when-fireplace-is-recessed
We get this question a lot, so I thought I'd do a quick post to show that you can have custom built ins even if your builder didn't put your fireplace in exactly the right spot!

Typically, custom cabinetry surrounding the fireplace is possible when the fireplace juts out into the room. 


custom-fireplace-built-ins

But that doesn't mean you can't create a similar look if your fireplace is flush with your walls. Here are some great examples from Houzz and Pintrest:
 This is a clean, simple, and most of all, timeless look. 


 This one caught my eye because of the way they tied in the hearth with the built in cabinetry and used the furniture base molding to finish off the entire facade. 


 For a classic, traditional look, panel above the fireplace. It's the perfect balance of book/accessory space and display space. 


flush-hearth-fireplace-builtins

This example shows how the homeowner left the flush hearth and added the built in cabinetry without disturbing the flow of the fire box and hearth.  

Enjoy and be inspired to tackle some custom built ins for your own home!

Pumpkin Topiary Tutorial: Don't worry, it's easy!

$
0
0
Easy Pumpkin Topiary Tutorial
Fall decorating is in full swing.

Step 1: Gather your materials!


I started with three pumpkins of varying sizes, some fall picks, leaf garland and grapevine garland.

This urn was lying around the backyard, so I tossed out the dirt and the dead plants to up-cycle it for its new purpose; my base.

These are the three pumpkins I chose, mostly because that's all that was left at A.C. Moore. Geez, do I have to start my fall decorating in July? The fall section was almost wiped out already.

 Some natural burlap-y ribbon for my bow on top.

 My garland was on sale for about $4 a strand. I used two.

Step 2: 
After combining the leaves and the grapevine, use your hot glue gun to adhere it to the urn. This was super-frustrating because my gun was leaking all over the place. OOOH! Doesn't Craftsman have a guarantee? Hang on while I go get it out of the trash can. I WILL drive 11 miles across town to Sears for a new one, just not today.


Ok, I'm back. Hmmm, I still have some holes where you can see the dark abyss of the bottom of the concrete pot. 

 Solution: Stuff the holes with random fall picks, twigs and berries.

Do you recognize this wagon? So multi-purpose!
Step 3:
After you get your base looking full and festive, the next step is to add a medium pumpkin to your totem pole. 


Well, now that the hot glue gun is out of commission, I had to get creative and come up with a way to affix the pumpkins so they'd withstand some fall breezes and rowdy trick-or-treat'rs. 

Continue adding pumpkins until you are happy with the height of your topiary.

Step 4: Skewer!
This makes me hungry. But it did the trick! The foam (or whatever these things are made of) was just soft enough that it was easy to poke the wooden skewers through without using any tools.

Now, you repeat Steps 2-4 until you have the desired number of layers. If you go higher than three I would suggest adding a dowel to the center for support.

Step 5: Add a bow!
This is a gift for Catherine. I'll be taking it over to her house tonight after we study for a Geography test (6th grade is really hard btw).

Hers is a little more "embellished" than mine. I promised last week I would show you how I made my pumpkin topiaries, so here they are.......


This is what my front porch pots look like most of the year. I add spring flowers and Christmas lights, so these planters are very versatile. 


I kept mine fairly simple since there are two planters and they are four pumpkins tall. 
 About every two or three years, I have to give my pumpkins a fresh coat of spray paint because they fade in the sunlight. The initial investment was well worth it though, because I can add a bunch of real ones to the mix without breaking the bank.


 I used a dowel rod on my topiaries for support. 


This year I added some grapevine to my pumpkins to give them a little more texture.


This is what my front porch has looked like for the past three fall seasons. The bucket arrangements were a tad tired so they got benched. Don't worry, I plan to use those Southern Living Door Buckets to make some cute spring door-adorables.


Here's how I replaced the faded flower buckets! For $25 I couldn't pass them up!


To sum it up, this year, I added a fresh coat of spray paint, a new fall garland and some grapevine. I have some Halloween bat lights that I'll bring out in October along with whatever kind of crazy jack-o-lanterns the kids carve. 


I hope you enjoyed the tutorial. We'd love to see what you create with artificial pumpkins!

For more fall decorating ideas check out
Blissful and Domestic
The Shabby Nest 
One Artsy Mama Serenity Now
Practically Functional Link Party
Scattered Thoughts of a Crafty Mom
homework
The Inspired Room div align="center">Made in a Day
>

Dramatic Before & After-Powder Bath Remodel

$
0
0


before-after-bathroom-remodel

As you may know, we moved recently. While the house is great, it needs my finishing touches. One of the projects on my looong honey-do list was a powder bath update.

You may remember my last powder bath:


magazine-covers-gallery-wall

I told you all about how to fill a blank wall on a shoestring in this post.


Today, we're on a little more than a shoestring but not much...


*Spoiler alert* Here's what we ended up with:


Martha-Stewart-Seal-Harbor-Vanity


arch-top-mirror-framed-mirror

I'll let you take a moment to bask in the glory of the finished space. 


Moen-banbury-faucet-chrome

Ah-mazing, right???


Here's the before:


perfectly functional, but a tad dark don't you think....


This dark cabinet behemoth is not really my taste. Good thing it was somebody's taste because I sold that bad boy on Craigslist! And, that's how you pad your budget friends!


Then it got ugly...


REAL UGLY. The plumbing had to be moved which is messy and not fun. 


Nothing says, welcome friends like a sink in the middle of the hallway! Seriously, I think I read that in Southern Living. 


After the plumbing was moved to accommodate the new vanity we got to the pretty part; the wainscoting!


That Williamsburg blue color is depressing me. 1980 called and they want their interior back. 


All of this was done to make the new vanity fit properly. You might remember we used this vanity in another remodel.


It comes already painted in Martha Stewart's "Sharkey Gray" which is a warm, light grey. One of our favorite bloggers, Emily Clark painted it green and used this vanity in her son's bathroom. So cute!


I liked it as is (I know, I'm shocked too!), and did not feel like painting it. A possible change IS coming to the hardware. 


Painting is our least favorite task, but it has to be done. A gallon of the trim paint was $50. Ouch, and before you ask--no, it didn't have gold flecks in it. 


Allen-Roth-White-Silver-Circles-Wallpaper

Allen Roth White/Silver textured Wallpaper. At around $35 for a double roll, it's a good value and the texture could help cover imperfections in your sheetrock. Normally, I advise people to go bold in a powder bath, and here I was considering a WHITE powder bath. Weird. Not taking my own advice because I fell in love with this wallpaper and wanted to use it!

But, in my defense...a powder bath is a great place to consider wallpaper because you're not covering too many square feet! That's called affordable lux!


So I bought a roll. It's in stock at Lowe's


After installing the vanity the progress came to a screeching halt. I worried that the paper was too modern for the cottage-y vanity.

After about three days of no progress, and polling all my friends I decided to go for it. What put me over the edge was something that my husband said to me. "That's what people  love about your style; that you combine modern and rustic in a unique way." Thanks for that boost of confidence sweetie! I <3 him! And, he's crafty too! How do you think I got that $0 labor?

It only took one and 1/10th rolls, so the second roll is now reserved for another future project coming soon.
Soooo happy with the choice.  Isn't that light fixture fancy??


Patrick wanted to rip out the floor, but I didn't hate it, so it stayed. It's a porcelain tile that mimics slate. I'd rather actually have slate, but I'm trying to stay on budget here.


Side view.
sharkey-gray-vanity

The faucet was an easy choice. I wanted something with a high arc and an 8" spread. Moen Banbury Faucet in Chrome finish.


powder-bath-update

The mirror-framed-mirror is from Homegoods. 
Searched for it for years! It was in my last house's powder bath and it came with me to the new house.

The last decision was the light. Patrick found one at Habitat for $10 that I loved, but one of the globes hung in front of the mirror which was no good. We'll take it down to the beach house

This two light was just the ticket.

                    Quoizel QI8602C Quinton 2-Light Bath Fixture, Polished Chrome


I used the Organize It All Estate Magazine Rack for some library time and the double roll holder (maybe I'll actually have TP on the roll when I go in).  

Amazon.com

Organize-It-Al- Estate-Magazine-Rack

The one I really wanted was Restoration Hardware. For the extra $90 I could have gotten one that the magazines don't fall out of the back, and the screws don't show.

Allen-Roth-White-Silver-Circles-Wallpaper-bath

Isn't it marvelous? Don't you just want to come over and use the facilities? Sometimes I go in there just to find my happy place. It's in there. 


clean-modern-white-powder-bath

Bonus: ANY color towel and accessories will work because the whole room was kept neutral. Are you seeing aqua at Easter and a rich green at Christmas? Why do I doubt myself? 


board-batten-wainscoting

Budget was $1000. The total came to $1198, but I sold the granite top vanity on Craigslist so technically we spent $798. I have Zero for the labor, but believe me when I tell you I'm paying for it.

Quoizel QI8602C Quinton 2-Light Bath Fixture, Polished Chrome


Dream Kitchen Remodel with all the bells and whistles

$
0
0
Since we've all spent a fair amount of time either cooking or eating in the past few days, I am inspired to share a kitchen renovation completed by Poovey Construction nearly a decade ago.

The lesson is that design trends may come and go but you simply cannot go wrong with classic, cherry cabinetry.


The client wanted a timeless design without being trendy.


If you use timeless materials and your kitchen will never look dated.


I love the depth the contrasting island granite brings to the room without making the space seem dark!


Appliance garage with retractable doors-convenience without the clutter of devices "on" the countertop.


Although cost wasn't an issue in this case, a smaller version of a large copper sink is one way to have "budget luxe".


What is your preference? Trendy or Timeless?

Ikea Bletviva Life Hack: How to train your curtains

$
0
0


Jacki just moved this summer and is hard at work turning the new house into their family HOME. 

As everyone knows, moving is expensive so it's smart to save where you can and make splurges count!

The bedroom looked pretty good when they moved in:

Benjamin-Moore-imperial-gray
Previous Owner's decorated bedroom

The wall color is Benjamin Moore Imperial Gray. I found some photos on the internet of the paint, but they didn't truly represent how the color really looks. It is the prettiest blue-gray.


Because I know you want to know, the Duvet Cover and Shams are Cynthia Rowley. Amazon has a fabulous selection here. If you're wondering how to make your bed adorable like this, see our tutorial.


Alas, one thing missing--the windows need dressing. Nothing cozies up a room like some curtains, right? Hang 'em HIGH ladies; it'll make your ceilings seem taller. 

ikea-blekviva-curtains-gray-stripe

While our clients hire us for our expertise, there are always new products coming on the market and this fun job allows us to shop constantly (and our husbands don't even mind!). Several of our clients have purchased the these curtains and we never cease to be amazed at how AWESOME they look. These are the Ikea Blekviva Curtains in Gray Stripe and only cost $50 FOR A PAIR! I think they look way more expensive. They even have blackout lining to darken the room for sleeping! Seriously?!


Having worked with a seriously high end decorator years ago, Jacki DEFINITELY has champagne tastes and a beer budget. These are great straight out of their package but to get the "designer look" they needed a tweak. This is the look she was going for:


But, something like that would cost hundreds of dollars per window. 

Only problem was, right out of the package, the draperies seemed a little sloppy. 
And as "they" say, necessity is the mother of all invention...

I give you the cereal box life hack:


Yes friends, those are cereal boxes (Raisin Nut Bran and Captain Crunch to be specific) and Jacki carefully put the boxes in position to "train" some pleats into these beauties. 


Check back with us in a couple of weeks or so, after they've had time to behave themselves and fall into perfect pleats. Jacki will "release" them just before her guests arrive for Christmas. 

Brilliant, am I right?


Breakdown:
Ikea Blekviva Gray Stripe Curtains Panels: 2 pair, $100
Tailor labor to hem to 93":  $48
(SO embarrassing that I didn't hem them myself. I can't find my sewing machine! Seriously, it has to be in a box somewhere.)


Total: $208 for TWO windows. 


Applause please.


As you're spending your entire decorating budget on holiday gifts and festivities, remember what your mother said: "Breakfast is the most important meal of the day!" She didn't know how right she was!


Faux River Birch Branches- EASY Tutorial

$
0
0
greenery-branches-holiday-planters


I have been admiring the decorating trend of using river birch branches in home decor. 


Setting for Four blog featured a front porch container that knocked my socks off!
tall-porch-planter-greenery-birch

After scouring my neighborhood trails with saw-in-hand, I was unable to come up with any birch branches. 

christmas-greenery-porch-decorating

I'm crazy about these from Crate and Barrel, but at $10 bucks a stick, they are a little steep.

After spending my childhood picking up sticks in the yard, I'm pretty sure my father would not approve of my buying $100 worth of sticks for some decorating project. 

Insert: my genius friend Debbie and her fabulous, frugal and functional Faux Birch Sticks!

birch-branches-in-an-urn

She started out with simple dowel rods from the home improvement store. Amazon has them too if you like the convenience of delivery to your doorstep.


Simply paint your dowel rods and then loosely apply some newspaper shreds using a tacky glue like Aleene's.


Leave some of the edges curled up for a great birch effect. 


After your stick is covered and painted, just stipple on some brown craft paint to simulate the birch knots in the wood. 

easy-birch-branches-using-dowel-rods

Voila! 
how-to-create-faux-birch-branches

Can you believe how natural they look? 
greenery-urn-birch-branches

I'd love to try to make a knock off of the Grandin Road Birch Tree.


Happy Decorating! 


Holiday Gift Guide

$
0
0


You know it's that time, right? It's do or die. End of the (shipping dead) line.  Luckily for you, Decor You Adore is here to help with a quick shopping guide. Check all the nice people off your gift list!

Let's break it down by category:

Kids:

We won't make up some glossy blogger jargon about how they're the most fun part of the holiday season. Here's the deal, We cannot help you with your kids main gifts. All they want is electronics and gobs of Chinese junk that cost $.03 to manufacture and you're paying $19.99 (regularly $25.49) after you get elbowed by some maniac at 4:03 on Black Friday (ed. note: doors opened at 4:00am). Hopefully the bruises have healed. Best of luck to you! Let's move on to stocking stuffers:

Is this underwater dog calendar adorable or what? $11.52

underwater-dogs-calendar
$11.52 from Amazon

Decorating Bonus: When you are finished with the year, you can frame them and hang them on your wall!

framed-calendar-pages
Jacki's dog-loving eldest son's room


Husbands:
I hate to sound like a broken record but they want electronics too. Or, in Jacki's case something with a bright yellow DeWalt on the side of it. Not gonna happen. I suggest focusing on something more practical. Does your hubby get cold tootsies? And then put them on you in the bed when it's 27 degrees on the other side of the covers? Ahem, I digress:

What about some slippers like these: $16.00


Or a throw for his easy chair? $30


Decorating Bonus: You pick the color and can cozy up your room and the hubby with one shot.

And, throw a Home Depot gift card in his stocking for good measure. He will be thrilled.


Friends, Neighbors and the other important women in your life:

I guess it really depends on what your budget is. I always strive to give a thoughtful, tasteful gift that won't break the bank. Yea, you're right, a lot easier said than done. 

Here are a few ideas, all under $30.


For the coffee or tea drinker, even the gardener, try a vintage, stamped spoon: $37 for a set of 6 spoons.

vintage-stamped-coffee-spoons


Etsy Shop, Pretty Pretty Paris has offered a 10% discount to Decor You Adore blog readers! Use code FBFRIEND! But, hurry! Today is the last day you can order to ensure Christmas delivery. 


You can give a mirrored frame. $43 for a set of two.
Everyone appreciates a pretty frame especially when you include a meaningful photo.


vintage-mirrored-picture-frames


Faux croc tray. $19
They come in various colors and everyone needs to corral their junk. See Tray Chic.


Latitude Longitude Bracelet $23. 
Jacki wants one of these with the coordinates of her charming beach house on Oak Island. Does your loved one have a special spot? This is just the token to remember it!
Great "guys" gift too.


great-guy-gift-idea


Luminara Candle $28
LED candles with built in timers are the most brilliant design of this century. No more leaving candles lit and scraping wax off your Grandmother's antique end table. What makes the Luminara candle extra special is the faux-flickering-flame! It dances around like a real candle. 


dancing-flame-candle


And, last but not least. Let's not forget Rover. That guy (or gal) that sticks by you until you wrap the very last present on Christmas Eve.
Georgia waiting patiently to go for a walk.


Catherine's beloved, Buster 


The Gulpy! $8.65

Jacki uses her gulpy every day! It's perfect for keeping (wo)man's best friend hydrated on the go.


I hope this helped! What are your go to ideas for last minute gifts?

P.S. We celebrate Christmas but you can apply these gifts to whatever you're celebrating. Hannukah, Festivus, Kwanzaa or Tuesday.

And from our keyboard to your screen, 
Merry Christmas!


The Family Room...A Tale of Two Curtains.

$
0
0


I am a window treater. That's it. I like to have something beyond the blinds on my windows. 

Here's a tale of two curtains. It was painful. But stay tuned, it's going to be awesome.

It started when I saw some chairs I loved in Pier 1 a few years ago:


But, I thought the pattern would be limiting for the rest of my living room decor. Time passed but I didn't forget that pattern. 

Enter the captain's chairs at my breakfast table:


It was a way to ease into the pattern. It's a transitional room so the chairs in the "eating area" kind of tie into the living room. 


I really loved the chairs and if a little is good, more is better, right? 

So, I got busy and found the matching curtains. 


OK, here's the thing...my grandma called and wants her curtains back. Floor to ceiling floral is not where it's at.

Being a Certified Master Returner, I called Home Decorators to get my return authorization. Guess what? No dice. Apparently if you order one of the "additional colors available" that is considered custom and therefore non-returnable. Rut-ro. 

Enter Craig and his fab list. 

Waiting...Waiting...Waiting...

No takers. 

Hmmm...this is not good.

So, now I have 2 108" super floral-y curtains that I hate on the windows. Of course I got them on sale but that is no consolation since I hate them (on the windows). A sale item that you can't use, might as well be, dare I say, full price (hoarders, take note). 

At the very same time that my floral curtains were taking up space in a drawer, the holidays were quickly approaching. And, I had two empty curtain rods in my living room. The absolute horror.

I went back to my old friend Pottery Barn and ordered two, plain white panels. Yes, I do see the ironic 180 that just happened here. 


OK, problem solved for the moment. 


Then the holidays pass and I need the drawer space for holiday decor. The curtains need to go. I love the pattern. I'm confused. 

Epiphany strikes! I have been looking for the perfect fabric for a table topper for the skirted round next to the couch. This could be it. 


Don't judge me for all the beige and tan. Rome wasn't built in a day people.
Testing...1...2...3...
Curtain, folded in half for a visual trial run. 
I quickly make the trip to my favorite fabric store with curtain in hand. The trim diva hooks me up with some ah-mazing fringe trim.


Booyah!
Since I have ZERO sewing skill, I took the curtain and the trim (with written directions from the trim diva) to the tailor shop. Two days later, I picked up this little piece of magic. 


I had some fabric left from the making of the table topper, so I sent it to my fave seamstress to make a lumbar pillow for the corner of my sectional. It will be super legit.

Now I have one entire curtain left. What will I do? I will make I will have someone make valances for those little windows over the couch. I'll keep you posted.

I still need a print for over the couch. I have one and it is actually a pic my husband took of our beloved little downtown. It's at the canvas shop now. Stay tuned. 

Sorry about the glare and the two dog butts. They ignored repeated pleas for them to move.

Why You Want a Vent-Free Fireplace

$
0
0
Fireplaces have always been among THE amenities for prospective new homeowners. Just behind patios, decks and porches, fireplaces are at the top of home-buyers' wish lists.


The cost of adding a fireplace to an existing home used to be prohibitively expensive- requiring the creation of an exterior stone chimney, flue, firebox and, in many cases, floor supports to accommodate the weight of the hearth. But today's options are not only affordable, but a relatively easy home improvement project. 


When we moved in, I knew that 1993 green marble had to go...quick. What I didn't know was that it was 2 for 1 day at the Poovey's!


vaulted-family-room-orange-navy-green
Family room fireplace before transformation: gas insert in a wood burning fire box. 

Since no actual combustion occurs in gas fireplaces, zero-clearance installation is possible, which means that these fireplaces can be installed in direct contact with combustible walls and floors. 


Fireplace: Before

Vent-free: A ventless gas fireplace works on a fairly simple principle. When installed, the "fire" is adjusted to burn at optimum efficiency, minimizing the production of harmful carbon monoxide gas and moisture to a safe level that can be vented into the home. The result is a comfortable, clean burning fire that burns much more efficiently than ventless fireplaces, saving you money on your gas bill in the process.


Hellloooooo, Habitat Reuse Store! Someone donated this brand new (likely a floor model) beauty to Habitat. It's exactly what we needed for our family room.


The first step was to remove the existing mantel and marble surround. In the spirit of "reuse" the old fireplace was turned around and installed on the screened porch. The existing flue was used to vent the fireplace out through the chimney. 

The old fireplace (gas insert removed) turned around to the exterior of the house. More on the screened in porch to come!


My wall color is SW Worldly Gray in case you were wondering.


I found this split-face quartz stacked stone at Lowe's. It took about 60 square feet to finish the fireplace. I love how Patrick cut the edges. It looks seamless. 


dessert_quartz_ledgestone_lowes

It's called Dessert Quartz Natural Ledgestone and costs $4 per piece.


Now, for a mantle. I was inspired by Thrifty Decor Chick's amazing fireplace transformation. LOVE the gray color. I like the dark charcoal gray in her room, but for mine, I wanted something a little lighter. 
I'm considering SW Anonymous which has a slight green undertone.


quartz_stacked_stone_fireplace_slate_floor
     I wanted to have it painted before I blogged about it, but I just couldn't wait!

dessert-quartz-stone-fireplace


VENTING OPTIONS

There are other venting options available for gas fireplace installations:
Natural vent, often called B vent, utilizes an existing masonry chimney or a factory-built metal chimney.  Room air exhausts combustion by-products to the outside via a flexible liner or single pipe installed within the chimney.
Direct-vent fireplaces draw in outdoor air for combustion, then expel spent air to the outside through a dual (co-linear) venting system, eliminating the heat loss associated with conventional chimneys.They can be vented up through the roof or out to the side or back of a house; a perfect solution for homes without an existing chimney.  Direct-vent units must, however, have a sealed glass door to maintain proper combustion and ensure efficiency and indoor air quality.


Beach House Bath Remodel- Stunning Before & After

$
0
0


When remodeling our tiny little beach house bathroom, I wanted some kind of WOW factor. When I was looking online for tile, there wasn't much out there in a bright, fun, beachy color. Then I found this aqua tile at Lowe's. How's this for wow?


I wanted a large tile that was relatively quick to put up and didn't have a lot of grout to keep clean. 


The tile is Interceramic Aquarelle Sky Blue. I ordered it online, which is risky, but I absolutely love the color and size of it. 


But before I get into the details, I have to show you the yucky "before" pictures of this dark, tiny bathroom. 


One of the biggest problems with the bathroom aside from the finishes, was the layout.   


The toilet and sink were crowded together, and there was this weird step up when you entered the room. 


We quickly learned when doing the demo that that step was hiding an atrocious amount of plumbing bits and pieces. 


You can see in this picture that the vanity was only about 21" wide. and the toilet was one of those round, short bowls. Not good. Time for an upgrade!


 Everything OUT!


After the demo of the original bathroom and a whole lot of plumbing work, we got to the fun stuff. 


Are you already in disbelief? Me too. 


The cement board and new shower pan went in. Ready for tile!


After grouting the shower tiles, we installed new wood paneling. The beach house was built in 1960, so there isn't any wallboard in the entire house. The paneling really fits with the era of the house.


A couple coats of paint on the paneling and the toilet and sink can go back in. 

I should mention that we ordered this tile eons ago to do the entire downstairs. I love the faux wood, porcelain. It's durable and looks fantastic. The color is like a washed up piece of driftwood. We also used it in our outside shower.


faux-wood-gray-floor-tile

beach-house-bathroom-wall-paneling

We picked up the sink, faucet and vanity stand at our local Habitat Restore, but they sell them at Lowe's. Here's the link for the stand and the sink basin.


 If you want to see more of our adorable beach escape, go here for the tour!

Loving the color too! Benjamin Moore Seattle Gray.


lowes-aquarelle-sky-blue-tile

It's fun making selections for a beach house. I tend to still lean toward keeping it simple, without getting too theme-y. I think it turned out great!

Article 0

$
0
0


What Is My Design Style? 

if you’re looking to redecorate or are just starting out on your home décor journey, trying to find furniture, lighting, and fabrics that work for your style can be tricky—especially when you aren’t even sure what your style is! To help you narrow down all of the available options and make buying pieces a breeze, we’ve devised a handy slide show to showcase the top 10 most common design styles to help you find your interior aesthetic. 

Is Your Design Style Modern Eclectic?

$
0
0
You prefer to mix and match different styles rather than be totally traditional or modern, but you like to use the clean looks of more modern pieces. You love figuring out how to combine different designs into one cohesive whole. You are:

MODERN ECLECTIC

Related image
Eclectic Modern

Image result for eclectic modern
Explore the difference between Modern and Contemporary Design

There’s something dynamite about a space that resists the urge to meticulously match items in one design style. 
Related image

Many of today’s new furnishings are inspired by vintage pieces, so it’s easy to go eclectic by combining them with other statement items.
Eclectic style
Explore the do's and don'ts of Eclectic Style HERE

Creating Texture in Interiors

$
0
0
Introducing a variety of textures and patterns throughout your design scheme with throws, pillows, rugs and draperies can help to create a comforting environment. Whether linens, velvets or polished marble; utilizing textures through textiles and surfaces is key to design success.

When interior designers refer to texture it’s the surface quality of a material to which they are referring. A surface’s texture whether smooth or rough, furry or combed, can vary based on our perception as well as applied or directional lighting. Rough surfaces can seem more textured next to smooth ones when viewed up close, or even when lit from the side. We also imply texture through our assumptions about the material based on memories of touching similar surfaces. This perception is known as visual texture.


We often incorporate texture to enforce our design concept. Texture can be used to communicate a particular design style or to differentiate objects and surfaces. If a designer wishes to create a monochromatic scheme, texture can be the key to its success. Texture can influence scale, transform light and tell a designer’s story.


Similar to the way that color can affect how warm or cool a room feels, texture can influence the tone and weight of a room.

Texture can be added just about anywhere in interiors. Be cognizant of how your textured surfaces will add or detract from the overall design feel you are trying to achieve. From a glass coffee table to a textural wallpaper, try rough or natural textures to convey a rustic scheme or smooth and glossy ones for a modern interior.

It’s important to remember that texture adds interest to your room. The contrast that comes with texture will make important elements stand out. So go ahead and play off of your home’s architecture and create a canvas of textural wow’s.


Latest Images